Sunday, 13 April 2014

A - Z of The Blitz (A)

ARP Warden's badge (author's photo)
Today, we start what is intended to be an occasional and by no means exhaustive series looking at the Blitz and Battle of Britain on an alphabetical basis. Today, we look at the letter 'A' to see what we can find.

A is for ARP, or Air Raid Precautions. Today, when we think of ARP, we think perhaps of the eponymous Wardens personified in comedy by Chief Warden Hodges from Dad's Army, played by Bill Pertwee but in reality, ARP was a generic term initiated at the time of the Munich Crisis of 1938, when the possibility of war was first brought home to the majority of the British public.

The 1938 Munich Crisis saw a huge expansion of this country's Civil Defence services and saw the establishment of the ARP Wardens' service, who under local municipal control had responsibility for enforcing the blackout and acting as 'first responders' whilst on patrol during even the heaviest air raids. With the approval of the Government, there was even an Air Raid Precautions set of cigarette cards issued by the Imperial Tobacco Company which detailed such ARP related functions as creating a gas-proofed room within a house, protecting windows against blast, dealing with incendiary bombs, wearing gas masks and the balloon barrage. The card depicting a member of the public dealing with an incendiary bomb using just a garden rake and a dustpan beggars belief!

ARP Cigarette Card book (author's photo)


How to deal with an incendiary bomb (author's photo)
The public perception of the ARP Warden changed almost overnight once the Luftwaffe switched their attentions to bombing British cities. Before the war and during the so-called 'Phoney War' period, the wardens had been seen in much the same way as we see Mr Hodges today, in other words as self-important 'jobsworth' characters whose main function in life was to shout at people to "Put that light out!" or "Cover that window!"

Once the air raids started in earnest however, the view changed and the wardens were widely respected for their courage in patrolling in all conditions and for their selfless attitude. Wardens, both male and female were almost all volunteers and many could be described as being 'of a certain age. An inspection of the accompanying photograph of a group of Lewisham Wardens reveals many of the male wardens to be wearing Great War medal ribbons. 
Members of Lewisham Post G108 (author's collection)
A also stands for Anti-Aircraft.  In London, as in most major British towns and cities, anti-aircraft guns were placed on just about every large piece of parkland or other suitable open space. Therefore, in the capital guns sprouted on places such as Blackheath, Woolwich Common, Southwark Park, Wanstead Flats and even Hyde Park. As with most war materials in Britain, anti-aircraft guns were in desperately short supply at the outset of the war and the situation was hardly improved by the British Expeditionary Force having to leave nearly all of it's anti-aircraft guns behind when they hurriedly evacuated from France in May and June 1940. The respite afforded to British cities by the Battle of Britain allowed stocks to be built up again and by the beginning of the Blitz, a measure of protection could be provided.
3.7" Anti-aircraft guns in Hyde Park (author's collection)
At first, the guns mainly provided a morale booster for the civilians huddled in the shelters. With the Luftwaffe switching to night area bombing and without radar control for the guns, accuracy was poor and the most that could be hoped for, apart from the occasional hit, was to force the German bombers to fly higher. On the basis of 'What goes up, must come down', there was at least as much chance of being hit by shrapnel from spent anti-aircraft shells as by a German bomb but recognising the importance of being seen by the British public to be firing back at the bombers, Churchill ordered General Sir Frederick Pile, commanding Anti Aircraft Command, to "Keep on Blazing Away."

Anti-aircraft rockets on Blackheath (Greenwich Heritage Centre)

The mainstay of Anti Aircraft Command was the excellent 3.7 inch gun, although both heavier and lighter weapons were used, as well as a brief flirtation with rocket projectiles which was not a success. As the war developed, radar control for the guns was developed and improved upon, as was the new proximity shell that detonated within a short distance of it's aerial target without actually having to impact  it. These new developments greatly improved the effectiveness of the anti aircraft guns. These developments, coupled with the Airborne Intercept (AI) Radar equipped night fighter force, demonstrated to the Luftwaffe upon their return to London in 1943/44 how things had changed since the dark days of the Blitz of 1940/41.

Next time, we shall take a look at the letter 'B' to include Barrage Balloons, Bomb Disposal, the Blackout, the BBC and 'Black Saturday.'

Published Sources:

Air Raid Precautions: An Album to contain a series of Cigarette Cards of National Importance - WD & HO Wills, 1938
The Most Dangerous Enemy - Stephen Bungay, Aurum Press, 2001


Friday, 28 March 2014

More from Mahnmal St Nikolai

Mahnmal St Nikolai (author's photo)

Following the last article on the Mahnmal St Nikolai in Hamburg, this week has seen several requests to see some more of the exhibition, so this week, I am happy to include some more photographs taken during our visit, although as the lighting in parts of the museum is somewhat subdued, some of the photographs taken are not of the highest quality.

As mentioned in the original piece, the museum takes an admirably anti-war stance and is quick to recognise that before Hamburg was destroyed by air power in 1943, the Luftwaffe had been meting out plenty of devastation itself. One city that was particularly on the receiving end was Coventry, Blitzed on 14th November 1940. So widespread was the damage that a new word entered the German language, which was to "Coventrate", in other words to devastate a particular target by bombing. 

Not long after this, on 29th December 1940, whilst watching the 'Coventration' of the City of London during the Luftwaffe's great fire raid, Sir Arthur Harris, soon to become C in C of RAF Bomber Command, uttered his now famous phrase "The Germans have sewn the wind, now they shall reap the whirlwind." After the War, Harris mentioned that it was the only time that he had felt truly vengeful and although it was originally a private comment spoken in the heat of the moment, there was no doubt that Harris, as the RAF's leading exponent of area bombing meant what he said.

It is therefore fitting that one of the first exhibits that the visitor sees in the museum is a cross of nails, taken from the ruined Coventry Cathedral and presented to another destroyed place of worship as an act of reconciliation.

Cross of Nails from Coventry Cathedral (author's photo)

The exhibition also pulls no punches when it comes to the twisted philosophy of the Nazi regime in apportioning blame for the war and shows a film poster for a movie shown in Hamburg and indeed across Germany during the war called 'Der Jude ist schulde am Krieg!' ('The Jew is guilty for the War') and posters such as this highlight the uneasy position that the church filled during the Nazi years in Germany.

Film poster (author's photo taken at the exhibition)

Another exhibit shows a truly bizarre board game, unbelievably aimed at German children, called 'Luftschutz tut not!' - which loosely means 'Air Raid Precautions are essential!' which was presumably meant to impress upon children what could be expected if or when Germany found itself at war.

Luftshutz tut not! (author's photograph taken at the exhibition)

On a more practical level, is a poster listing which items members of the public should pack into an 'Emergency Suitcase' in case they were unfortunate enough to be bombed out of their homes but lucky enough to survive. Similar posters were produced in this country and the packing list includes common sense items such as washing kit, toothbrushes, shoes, socks, towels, blankets, knives and forks and so on.

Emergency Packing List (author's photo taken at the exhibition)

It is a common misconception about the Second World War that the Germans were superbly organised and geared up for war, whilst the British were woefully ill-prepared and for the early years of the War, content to muddle through and improvise. As with all stereotypes, this theory does not always stand closer examination and the exhibition is very quick to point out that Hamburg, although Germany's second city and largest port, was an obvious target for the RAF in any future war, almost no effort had been made prior to the outbreak of war to provide any sort of protection for the civilian population against air raids. Perhaps this was borne of Nazi arrogance, that in any future war, no enemy would get close to bombing the Fatherland but faced with such staggering complacency, it is perhaps no wonder that the death toll from the Gomorrah raids was so high. Even by 1st April 1940, fewer than 3 percent of the Hamburg population had access to a safe air raid shelter and even by the summer of 1943, shortly before Gomorrah, this figure had only risen to 22 percent. For all their bluster, the Nazis had little regard for their own civilian population.

In contrast, the British, although still under-prepared, had at least started a massive expansion of the Civil Defence services in 1938 and had made a serious attempt to provide every household with either an Anderson Shelter for those that had gardens, or a Morrison Shelter for those that had not, or at the very least access to trench shelters. They had also instigated a mass evacuation of children and other vulnerable people and although the British authorities were to get some things seriously wrong, such as initially not allowing public access to the London Underground for shelter purposes, they quickly learned from their mistakes and were infinitely better prepared than the Germans when it came to protecting their civilian population.

As well as the precautions (or lack thereof),  the exhibition also shows us some of the hardware of destruction, both in archive photos and in reality. We see the main instrument of Hamburg's demise being loaded aboard a British bomber - the 4lb incendiary bomb. These were the bread and butter of the RAF's firebombing armoury and although larger incendiaries were available, it was these 4 pounders which rained death by fire upon German cities. Incredibly, the RAF dropped some 4,000,000 of these on Germany during the war.

RAF Ground Crew preparing 4lb incendiaries (author's photo taken at exhibition)

Also visible for real in the museum is the real thing, firstly an unexploded 250 lb bomb, obviously now made safe! 

Unexploded RAF 250 lb bomb (author's photo)

Although seemingly big enough, the 250 lb was an average sized High Explosive weapon and it is a sobering thought indeed when one considers that many of the Lancaster bombers on the raid carried a 4,000 lb 'Cookie' or blast bomb in addition to their load of incendiaries. The theory and practice of the RAF's bombing technique is explained at the exhibition, which put very basically was that the High Explosive bombs would initially blast off roofs and create openings in buildings, after which the incendiaries could be dropped into openings, thus allowing the fires to get a good hold. All of the while, further bombs would be dropping, forcing the firefighters to continue to take cover.

Some of the deadly debris of the raids is also on show in the shape of shrapnel; lethal bomb fragments which could cause havoc amongst anyone still out in the open. Also on display are normal household objects such as bottles and eating implements twisted into fantastic shapes by the tremendous heat generated by the firestorm.

Bomb fragments and other items (author's photo)

The exhibition also concentrates on the aftermath of the raids, both immediate and longer term. In the previous piece, we learned how inmates of the Neuengamme Concentration Camp were put to work in clearing rubble, removing bodies and most awfully of all, bomb disposal but one of their other tasks was to effectively seal off some areas of the ruined city until they could either be made safe, or in the longer term, rebuilt.

Gothenstrasse in Hammerbrook sealed off as a restricted zone (author's photo taken at exhibition)


In the immediate post-war era, we see how many families were literally living amongst the ruins in incredibly primitive conditions.

Living amongst the ruins early post-war (author's photo taken at exhibition)

Despite the appalling death toll, massive destruction and terrible privations suffered by the survivors, Hamburg rose again to once again become one of the premier ports and trading cities of post-war Europe and a visit to the wonderful viewing platform shows us the true extent of Hamburg's recovery. 

When in Hamburg, please visit the Mahnmal St Nikolai for it is a sobering experience and a lasting monument to the horrors and injustices of war.

Published Sources:

Gomorrah 1943: Hamburg's destruction through aerial warfare - Mahnmal St Nikolai, 2013


Friday, 31 January 2014

Wartime Greenwich & Woolwich

(Author's collection)
Over the four years that this blog has been appearing, it is fair to say that I have managed to insert a few wartime photographs of my own local 'patch' of Greenwich and to a lesser extent, Woolwich and each time that these photos have appeared, I have always been asked to share a few more. So in this week's blog, we are once again going to visit, what in 1939-45 were known as the Metropolitan Boroughs of Greenwich and Woolwich but which nowadays are united as the Royal Borough of Greenwich. Unless otherwise stated, all of these photographs come from the excellent collection of the Greenwich Heritage Centre and are reproduced here with their permission.

We actually start with a couple of pre-war photographs that show the preparations being made by the fledgling Civil Defence Services. The first shot is taken at a familiar location that is still easily recognisable today and shows the Greenwich Auxiliary Fire Service, or AFS on an exercise on the Greenwich river front on 28th July 1939.

Greenwich AFS on exercises - July 1939

The second photograph was taken at a location in Woolwich currently unknown to the author but shows the Air Raid Wardens of the borough undertaking a gas decontamination exercise, again in 1939. Mercifully, poison gas was never used by either side during the Second World War, despite stocks being held by both sides. The whole procedure has gathered some fascinated onlookers. Are any of these small children watching still alive, I wonder?

Woolwich Gas Decontamination exercise

Another vital cog in the Civil Defence mechanism was the WVS, or Womens' Voluntary Service as they were then known. The WVS were to be seen everywhere in wartime Britain, handing out tea and refreshments to returning soldiers evacuated from France in 1940, assisting with the evacuation of children and mothers at railway stations and other marshalling points and operating mobile canteens for the emergency services during the Blitz to name but a few of their activities. The photograph below shows another pre-war exercise in Woolwich, with the ladies stockpiling loaves, once more before a fascinated audience!

WVS ladies in Woolwich -1939

The next photograph shows a group of Woolwich children at Victoria Station on their way to being evacuated to Cranbrook in Kent. Once again, are any of these Children still alive today?

Woolwich children at Victoria Station - 1940

Once evacuated, these children from urban London and other major cities were thrown into an alien environment. The majority of them had never left home before and certainly not without their parents, so it must have been an enormous culture shock to suddenly move from a London suburb such as Greenwich down to rural Torquay. The photograph of this trio is especially poignant for me, as they are captioned as having come from my old primary school, Charlton Manor.

Charlton Manor evacuees - June 1940 (LMA)

What of those left behind - both children and adult? Following the fall of France in June 1940, invasion of this country was thought to be a serious possibility and so the Home Guard was formed as a result of Anthony Eden's call to arms. Initially christened the Local Defence Volunteers or LDV (or 'Look, Duck and Vanish' as they were named by some unkind people), this force was largely formed by gentleman of 'a certain age' who had seen service in the previous conflict, as the next photograph of the 26th (County of London) Bn., Home Guard shows. As well as the Great War veterans, there are also a fair number of younger members, perhaps waiting for their call-up into the fighting services.

'C' Coy, 26th (County of London) Bn., Home Guard in 1942

Sometimes derided, even at the time, there is no doubt that the Home Guard were prepared to make the ultimate sacrifice for their country and the attached extract from their Traning Manual shows what was expected of them should invasion have come.

Home Guard Muster Instructions (author's collection)

Although the German land invasion did not occur, the bombers of the Luftwaffe did visit London on a nightly basis. Greenwich and Woolwich suffered badly and the following selection of photographs shows some of the damage across the two boroughs. The first image shows the aftermath of a high explosive bomb at Stratheden Parade, Blackheath in the early hours of 19th October 1940. The pub visible on the right is the Royal Standard.

Stratheden Parade & The Royal Standard - October 1940

The sheer devastation caused by the 'airburst' effect of a parachute mine can be seen in this admittedly grainy photograph of Alabama Street, Plumstead on 20th March 1941, which sadly caused twenty one fatal casualties.

Alabama Street, Plumstead - 17th March 1941

Following the end of the 'First Blitz' in May 1941, a period of respite followed and Londoners may have been forgiven for thinking that by June 1944, with the invasion of Europe beginning to become an established fact, that perhaps the days of bombardment for London were over. Unfortunately, on 13th June 1944 the first of Hitler's so called 'Vengeance Weapons' began to fall on the capital and southeast London was once again in the firing line. Although the very first V-1 to fall on London landed in Bow, it wasn't long before Greenwich and Woolwich were on the receiving end of these weapons. An early recipient was the fire appliance factory of Merryweather's in Greenwich High Road on 25th June 1944.

Greenwich High Road - June 1944

Greenwich High Road was once again the target on 12th July 1944 when West Greenwich House and it's immediate surroundings were devastated.

West Greenwich House - 12th July 1944
 
After the V-1, came an even worse Vengeance Weapon, the V-2 rocket. Fired from mobile sites in Holland, these early guided missiles came with no warning whatsoever and destroyed their 'targets' totally at random. Once again, Greenwich and Woolwich were at the forefront, as this shot of Troughton Road, Charlton taken in the immediate aftermath of a rocket explosion on 8th February 1945 shows.

Troughton Road, Charlton - 8th February 1945

Fortunately, the end of the war in Europe was now a matter of weeks away and the last V-2 was to fall on London on 28th March 1945. The German surrender came on May 8th and this day was immediately declared VE (Victory in Europe) Day and the street parties could begin as in this example in Frances Street, Woolwich.

The day they waited for - VE Day

If these photographs have given you an appetiser to see more of wartime Greenwich, I will be guiding a Blackheath and Greenwich Blitz Walk on Sunday 30th March, in which more of these archive photos will be used to give a 'then and now' perspective of the area. Details of this - and all of our other walks - can be found at www.blitzwalkers.co.uk/dates.html and which also gives booking details.

Unpublished Sources:

Greenwich Heritage Centre photos
London Metropolitan Archives
Author's collection photos


Saturday, 18 January 2014

Flying with The Enemy: The 'Rafwaffe'

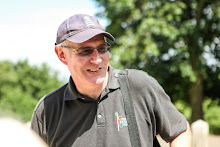
Bf109 in RAF colours (author's collection)

The job of the test pilot, whilst on the face of it a glamorous one, is also one of the higher risk professions that one can choose. Today it is undoubtedly safer due to advances in technology such as computer simulation, ground testing and the testing of unmanned models but during the Second World War, test pilots were being killed sometimes at the rate of one per week, such was the urgency to get new designs and new technology literally off the ground.

During the wartime years, as well as testing new designs, test pilots on both Allied and Axis sides had another vital role to perform - that of testing captured enemy aircraft. Whilst to the layman the prospect of flying the enemy's aircraft might seem a needless luxury, it actually played an important part in trying to stay one step ahead of the enemy, adopting their technology where necessary, countering it when it proved a threat and understanding what moves they might be making next. Flying these sometimes strange, often unknown machines was an even higher risk than flying new designs built by one's own industries.

In Great Britain, this task of flying enemy aircraft fell to 1426 (Enemy Aircraft) Flight RAF, based at the Royal Aircraft Establishment at Farnborough, which soon acquired the nickname of the 'Rafwaffe' due to proliferation of German machines on it's strength.

The story of how some of these aircraft were acquired was extremely varied; in the early years of the war when the British were largely on the defensive, it was nigh on impossible to capture German aircraft on the ground but sometimes opportunities presented themselves. One of the first Luftwaffe machines to fall into British hands was a Bf109, which was forced down more or less intact by RAF fighters at Amiens on May 2nd 1940. Quickly repaired, it was flown back to England and was used in comparison trials with Hurricanes and Spitfires which gave vital data with which to brief RAF fighter pilots in the forthcoming Battle of Britain. It established that whilst the Bf109 was indeed a formidable machine, it was not unbeatable and that the Spitfire was more than a match for the German machine, especially in the dogfight. Sometimes, German aircraft would present themselves to the RAF in more unlikely ways.

By the spring of 1942, the Battle of Britain won, RAF Fighter Command was persisting with it's ill advised policy of 'Leaning towards the enemy' by sending it's Spitfires - by now the improved Mark V version - on fighter sweeps across occupied France. Seemingly having learned nothing from the Battle of Britain when German fighters found themselves in hostile territory at the limit of their endurance, Sholto Douglas and Leigh Mallory, now in command of Fighter Command and 11 Group respectively, lost many experienced pilots and much needed fighters on these pointless 'Rhubarbs' as the fighter sweeps were christened. It was during this time that a new and more deadly German fighter began to appear on the scene - the superb Focke Wulf FW190, designed by Kurt Tank. The Spitfire Mk V was being outclassed by the new fighter and losses in 11 Group in particular, which bore the brunt of these almost daily sweeps, were mounting at an alarming rate. Very little was known about the FW190 and whilst it was hoped that the new Mk. IX Spitfire, with the upgraded Merlin 61 engine was going to be able to match the 190, an example was required for evaluation purposes. The problem was that the Germans were now masters of Europe, there were no FW190s flying in the North African theatre of operations and there seemed to be no way of getting hold of an undamaged example.

Jeffrey Quill (author's collection)
An ambitious plan was hatched by Captain Philip Pinckney of 12 Commando, Royal Marines, who in cahouts with Supermarine test pilot Jeffrey Quill, planned a raid on a Luftwaffe airfield in occupied France to snatch an example, with Quill being the man with the capabilities to fly a strange aircraft back to England. The idea was to take 'E' Troop, led by Pinckney across the Channel in a motor gun boat, land covertly near Cherbourg before moving on the nearby aerodrome at Maupertus. The plan was codenamed 'Operation Airthief' and on Quill's advice, was planned to take place shortly after dawn, when the aircraft engines were regularly started and run-up. This would save Quill the trouble of fumbling in the dark, trying to start from cold a strange aircraft with potentially even stranger controls. Quill himself was somewhat dubious about the whole enterprise, although he was confident about being able to fly the FW190 and understanding the controls, as he had flown the captured Bf109 back in England. His cause for concern was being able to reach the airfield at the right time and then to reach the cockpit of a likely aircraft - he gave the whole plan no better than a 50:50 chance of success but with their seemingly being no other option, he was quite prepared to go along with it. 

The plan was approved by Combined Operations on 23rd June 1942 but by an amazing coincidence on the very same day, the whole operation was made redundant by one Oberleutnant Arnim Faber of the Luftwaffe, who landed an undamaged FW190 at RAF Pembrey in South Wales and compounded his error by making no attempt to destroy his aircraft once he realised what he had done. It later turned out that Faber, having shot down an RAF Spitfire over Start Point in Devon, became disoriented and instead of flying south to his base in France, flew a reciprocal course and landed at Pembrey instead. Whatever the reason, the British had their 190 without the need for a Commando raid and although Philip Pinckney was outraged that 'some bloody fool' (as he put it) had gifted the British with one, there was no guarantee that the raid would have been successful. Jeffrey Quill later had the chance to fly the FW190 and speculated whether he could have worked out the controls during the course of a rushed take off - he felt reasonably confident that he would have been equal to the task. Later still, when testing the new Griffon engined Spitfire, Quill flew in a race against the FW190 and comfortably beat both it and the Hawker Typhoon. 

Capt. Eric 'Winkle' Brown in the 1960s (BBC)

One of the leading lights in the 'Rafwaffe' and indeed someone who was to become it's commander, was not an RAF officer at all but rather an officer from the Senior Service, the legendary Eric 'Winkle' Brown. In early 1945 Brown, a German speaker and then a Lieutenant RNVR but already with a great reputation as a test pilot was promoted to command the Enemy Aircraft Flight and in April 1945 was despatched as part of a large team to Germany with a brief to capture and interrogate leading personalities of the German aircraft industry as possible. Included on the list of potential 'interviewees' were such luminaries as Werner von Braun, Dr Ernst Heinkel, Willy Messerschmitt, Kurt Tank, Hanna Reisch and the Horten Brothers. The other part of their mission was to get hold of as many of the new and highly advanced German aircraft, which fortunately for the Allies, had not come into service in time in sufficient numbers to alter the outcome of the war.

Arado 234B (Kogo)
Upon arrival in Germany, Brown visited Belsen and despite having worked and studied happily in Germany before the war, this experience left him in no doubt as to how Germany had been corrupted by Nazism. Brown soon selected the airfield at Schleswig as a suitable base to gather captured German aircraft before flying them back to Farnborough for evaluation. He soon built up excellent relationships with his American and even Russian counterparts, although with the latter, the distrust and suspicion that would soon degenerate into the Cold War was all too apparent. Brown was also able to select suitable German ground crews, who could be trusted sufficiently to work upon the aircraft selected for shipment back to the UK. Under Brown's stewardship, the 'Rafwaffe' was quickly able to build up a large stock of ex-enemy aircraft, including the Arado 234, a new jet bomber design as well as the Me262, a superb jet fighter which could have wrought havoc with the Allied bombing offensive had it not been for Hitler's instructions to convert it into a fighter-bomber, which fortunately for the Allies delayed development sufficiently for this potential world-beater only to come into service in relative penny-numbers. Brown was able to test fly both of these aircraft, as well as the many other that the unit was able to acquire, such as the fearsome rocket powered Me163, the huge Blom + Voss flying boat, the BV222 and the tandem engined Do337 'Pfiel' (Arrow), as well as more familiar aircraft such as the Ju88 night fighter, with it's advanced radars.

Eric Brown also got to speak to many of the people on his original list including Hanna Reitsch, whom he had briefly met before the war but whose apparent unrepentant devotion to Hitler and the Nazi cause made Brown's blood run cold. He also managed to interview Hermann Goering, on the strict instruction from the Americans that he was to limit his conversation to aviation matters only.

The 'Rafwaffe' was officially wound up in December 1945, although individual aircraft continued to be evaluated at Farnborough into 1946. The information yielded from these aircraft and from their test flights provided vital data in the development of British (and American) aircraft and radars well into the 1950s.

Eric Brown continued at the forefront of test flying and pioneered many developments in aviation during the 1950s and early 1960s. He made the world's first deck landing at sea in a jet aircraft in December 1945 when he landed a de Havilland Vampire on the flight deck of HMS Ocean and holds the world record for the number of deck landings (2,407) as well as the record for the number of aircraft types flown by an individual pilot, which at 487 is unlikely to be broken. He retired from the Royal Navy in the rank of Captain in 1970.

At the time of writing, Eric Brown is still going strong and is about to celebrate his 95th birthday on the 21st January. To him and all of his colleagues, we owe an enormous debt of gratitude.

Published Sources:

Spitfire: A Test Pilot's Story - Jeffrey Quill, Arrow Books 1985
Wings on my Sleeve - Captain Eric 'Winkle' Brown, Phoenix 2007


Tuesday, 17 December 2013

'Get off my bloody ship!'

HMS Peterel's crest
By the time of the Japanese entry into the war in December 1941, most of Britain's Eastern Fleet, the so-called 'China Squadron' had been withdrawn to home waters or the Mediterranean in order to counter the Axis threat and as a result, when Japan attacked Pearl Harbour, typical of the British defences of her overseas interests in the Far East was the River Gunboat HMS Peterel, under the command of 62 year old Lieutenant Stephen Polkinghorn RNR.

Incidentally, the spelling of the Peterel's name, though incorrect, was a perpetuation of a mistake made by a clerk in the Admiralty at the time of the first ship to bear the name in 1777. Built by Yarrow Shipbuilders in 1927, Peterel was armed with two 3 inch guns as well as eight Lewis machine guns dating from the First World War and her job, along with her sister ship Gannet and many other similar gunboats was to patrol the inshore waters of Britain's eastern empire protecting her interests, defending the numerous British merchant ships in the area and generally 'showing the flag' to keep up morale of the expat population. Any serious fighting would be left to the larger warships of the China Station. The trouble was that by December 1941, there were practically no larger friendly warships left in the region and the River Gunboats would just have to do the best that they could.

Polkinghorn was a New Zealander whose peacetime job was as the master of small coastal steamer but on the outbreak of war had been appointed to command the Peterel. War with the Japanese had long been considered likely but their sneak attack on Pearl Harbour had taken everyone by surprise. Nevertheless, Polkinghorn had already rigged scuttling charges on the Peterel so as not to allow her to fall into Japanese hands should war break out and now, on 8th December 1941, war became inevitable.

The Peterel's ship's complement had been reduced from her normal fifty five to a mere twenty one, three of whom were ashore overnight on the night of 7th/8th December. She was moored in the Whangpoo River, Shanghai and with her reduced complement, was acting as a floating W/T Station for the British Consulate. Downstream from the Peterel, lay the American gunboat Wake, which was performing a similar task for the American Consulate. Further downstream, lay the Japanese cruiser Izumo as well as a Japanese destroyer and a gunboat. An Italian gunboat, the Lepanto was also moored nearby, although she was to take no part in the action that followed.

HMS Peterel (NavalHistory.net)

In the early hours of 8th December, a motor launch flying the Japanese flag came in view and was obviously approaching the British gunboat. In the stern of the launch were several senior naval officers and the boat was also crammed full of heavily armed Japanese marines. The scene was described by Desmond Wettern as follows:

"Up on the fo'c's'le Able Seaman Tipping handed Able Seaman Mariner the Quartermaster's pistol and belt. Mariner watched the Japanese launch come alongside and saw a senior Japanese naval officer come on board. He heard the officer say 'We want to keep the peace of Shanghai.' 'Come into the wardroom,' Polkinghorn replied. Mariner gripped the pistol more tightly. The rest of the conversation was lost to him.

The next thing both Munn (another Able Seaman) and Mariner heard was Polkinghorn saying 'Get off my bloody ship.' The Japanese officer, who they later heard was chief of staff to the flag officer in the port, climbed back into the launch after handing a copy of the surrender demand to Polkinghorn. The launch started to move back downstream.

Lieut Stephen Polkinghorn RNR
Polkinghorn and Munn watched the Japanese launch move away from the ship. It had not gone more than a few yards when two red Very lights were fired from it.

After the Japanese launch had left the ship, the Japanese guns on the French Bund and across the river on the Pootung side had joined with the Izumo as well as the destroyer and the gunboat, in firing on the Peterel. As soon as he saw the Very lights go up from the launch, Polkinghorn gave the order for the ship's two manned Lewis guns to open fire. From 'A' gun deck, Petty Officer Linkhorn poured a steady stream of fire into the Japanese launch. Mariner manned the other gun and joined with Linkhorn in firing on the launch. Several of the men in it were hit. Neither had time to realise that they were the first Englishmen to open fire on the Japanese in the war.

The fire from the Japanese ships war murderous. One destroyer only 200 yards away was pumping shells into the tiny gunboat. Fortunately, one shell in the action parted the forward cable and the ship swung across the river, leaving one side comparatively safe from the enemy's fire."

Polkinghorn and the seventeen crew members aboard at the time managed to escape the blazing gunboat but only twelve survived, the Japanese machine gunning several of them whilst in the water. The survivors managed to get aboard a neutral Panamanian registered merchant vessel that was laying in the river but in a clear (and sadly typical) violation of international law, the Japanese boarded this vessel and removed the survivors, the majority of whom spent the remainder of the war in Japanese internment camps in China, although in May 1945, some were moved to camps in Japan itself. All survived the war and upon release in 1945, Polkinghorn was awarded the DSC in recognition of his refusal to surrender despite impossible odds.

A new HMS Peterel entered service with the Royal Navy in 1976 and rather endearingly perpetuated the original incorrect spelling of the name. She was sold as a result of one of the endless rounds of defence cuts in 1991 and with the vastly reduced size of the modern Navy, it is unlikely that we shall see another ship bearing the same name. Stephen Polkinghorn lived in retirement in New Zealand until the age of 97, whilst Jim Mariner, who fired those first shots against the Japanese Navy, spent twenty eight postwar years as a Police Officer in Bournemouth and passed away aged 90, in 2009.


Published Sources:

The Lonely Battle - Desmond Wettern, WH Allen 1960
The War at Sea - editor John Winton, Hutchinson 1967
Warships of World War II - HT Lenton and JJ Colledge, Ian Allen 1973

Friday, 29 November 2013

The All American

The crippled All American in flight (Warbirds News)

Earlier this month, I had the great pleasure of guiding Barbara and John Kinnear from Santa Barbara, USA on a Blitz walk around Westminster and during the course of our walk, I discovered that Barbara's late father, the then Captain Richard E Evans had served in North Africa with the 346th Bomb Squadron, 99th Bombardment Group, 12th Air Force and had indeed served as the personal pilot of General Bernard Montgomery's B-17 Flying Fortress for some time during that campaign. That, as they say, is another story which will be covered in a forthcoming edition of this blog but as a result of the mutual interest that we both have in World War 2 history, Barbara recently sent me another story of a B-17 and how due to the skill of it's crew, the soundness of the aircraft's construction and no little measure of good fortune, this particular aircraft survived terrible damage and brought it's crew safely back to base. 

Sadly, the story that was emailed to Barbara had become something of an urban myth perhaps due to constant retelling but the essence of the story is true and this Thanksgiving Weekend seems an appropriate time to tell the accurate version of the story of the 'All American.'

The Boeing B-17 was a four engined heavy bomber originally designed in the mid 1930s and entering service with the US Army Air Corps in 1938. Entry into service was slow however, and by the time of the Japanese attack on Pearl Harbour, fewer than two hundred machines had been delivered, although much larger orders were pending. Despite it's name as the Flying Fortress, the early marks were not really adequately defended against determined fighter attack and it was not until the entry into service of the B-17E in early 1942 that introduced a new tail gun position, together with ventral and dorsal turrets that the B-17 began to positively bristle with armaments and could go onto the offensive in the European Theatre of Operations. 

The later B-17F introduced the 'chin' turret  and although these marks of the Fortress boasted no fewer than thirteen gun positions, the B-17 was no more capable of flying unescorted missions over German occupied Europe than the early British attempts in 1939. However, with fighter protection - at first provided by RAF Spitfires on shorter range missions and later by the superb P51 Mustang which had the range to fly to Berlin and back to Britain - the tight formations of B-17s enabled the Allies to bomb Germany around the clock, the RAF mainly by night and the USAAF by day. The B-17 could never carry as heavy a bomb load as it's British equivalent, the Lancaster but it had a higher altitude for bombing and operating by day enabled it's attacks to be carried out with greater accuracy, at least in theory.

The particular B-17 we are looking at today though, did not operate in the European Theatre but rather in North Africa, to be precise the bomber named 'All American' by it's crew was part of 414th Bomb Squadron, 97th Bombardment Group of the 12th Air Force based at Biskra, Algeria and on February 1st 1943 was part of a raid on Tunis, which at that time was still in German hands, being used for the supply of Rommel's beleaguered Afrika Korps which was gradually being squeezed out of North Africa by the Allies.

Inspecting the damage after landing (Warbirds News)

The All American, under the command of Lieutenant Kendrick R Bragg Jnr. along with her squadron colleagues had already braved German fighters and flak before making a successful bombing run. Turning for base, the formation again came under attack, this time from two Bf109s, one of which attacked the lead aircraft, whilst the other concentrated it's attentions upon the All American. The first fighter was shot down by the bomber leader, whilst the second made a head on attack upon Bragg's aircraft. The German fighter was met with a withering barrage from the All American's guns and began to roll away from her intended prey. The gunfire from the B-17 must have killed the Messerschmitt's pilot and instead of rolling away from the bombers, the fighter collided with the Fortress with a sickening crunch, tearing a huge gash in the B-17's tail section and ripping off the port stabiliser before the fighter plummeted to the ground. Amazingly, nobody aboard the B-17 was hurt and after what must have seemed an eternity, the crew discovered that their bomber, though seriously wounded, was still flying and that the tail section had not fallen off.

The tail section was visibly moving and the crew, fearing that their aircraft could break up at any moment, donned their parachutes ready to escape. However, the wounded bomber managed to keep flying, at first closely escorted by her squadron colleagues and then, safely out of range of further German attack, limped on alone before managing to reach base at Biskra and landed safely, although perhaps not surprisingly without a tail wheel which had been disabled in the collision.

Apart from the skill and bravery displayed by the pilot and crew in nursing their crippled bomber back home, this story is also a testament to the strength and soundness of the design as well as to those who built the B-17 at Boeing in Seattle. 

I am indebted to Barbara Kinnear for making me aware of this story and also to the excellent Warbirds News website for helping to set the record straight.

Next month, I hope to tell the story of Monty's B-17, how he came to 'win' it and to tell something of the men who flew for him.


Tuesday, 5 November 2013

San Demetrio, London

mv San Demetrio (Crown Copyright)
In November 1940, although the Battle of Britain had officially ended, the people of Britain's towns and cities were settling down to a long winter of bombing that they would have to endure throughout the long nights of winter right through until the spring of 1941 when at last, Hitler's eyes would begin to turn eastwards to fresh conquests against his erstwhile ally, the Soviet Union.

Apart from the hardships brought about by the Blitz, the British public were starting to feel the pinch of the rationing of all sorts of products from foodstuffs to fuel. This shortage of petrol had already forced the majority of private cars off the roads and what petrol as could be imported was mainly reserved for the war effort. The fall of France in June 1940 had brought the major ports along France's Atlantic coast into the hands of the Germans and the vessels of the Kriegsmarine no longer had to make the perilous and fuel consuming voyage through the North Sea or the Greenland-Iceland-UK Gap in order to reach the rich pickings of the Atlantic convoys.

Prior to the fall of France, convoy after convoy had sailed safely across 'The Pond' without ever seeing a submarine or a surface raider but this had now all changed and the supplies to Britain and her Empire, at this time standing alone against the Nazi threat, were suddenly in danger of being cut off. 

Today, when asked about the Battle of the Atlantic, most people would imagine that the threat came solely from the U-Boats and to a great extent, this is true but in the early years of the war especially, there was also a substantial danger posed by surface raiders such as the so-called 'Pocket Battleships' of the Admiral Scheer class. One of these, the Graf Spee, had already been hunted down and destroyed in December 1939 giving the Royal Navy it's first major victory of the War. However, this victory had come after the raider had created havoc and alarm amongst British merchant shipping in the southern sea lanes. 

Now, another raider was at large; Admiral Scheer was prowling the North Atlantic in search of easy pickings in the form of either unescorted merchant ships, or the still woefully under-escorted convoys that were streaming across from Halifax, Nova Scotia.

Admiral Scheer (US Naval Historical Center)

One such convoy was HX84, which had sailed from Halifax on 28th October 1940 and by 5th November was well into it's voyage, which was intended to end at Liverpool around the 11th November. For these early convoys of the war, the close escort was pitifully weak and at this mid-Atlantic stage of the convoy, consisted solely of the Armed Merchant Cruiser, Jervis Bay, under the command of Captain ESF Fegen RN, which in spite of it's impressive sounding title, was basically a converted passenger ship of the Aberdeen Commonwealth Line, which had been requisitioned by the Royal Navy and hastily armed with seven 1898 vintage six inch guns as well as a couple of three inch anti aircraft guns from First World War stocks. It was intended to reinforce the escort for the final leg of the voyage into Liverpool but in the meantime, Captain Fegen and the remainder of the convoy waited anxiously in hope that there would be no fireworks on the 5th November.

As darkness fell, these hopes were dashed as the Admiral Scheer discovered the convoy and began approaching in the expectation of easy pickings. Despite being hopelessly outgunned, Fegen ordered the convoy to scatter under cover of a smokescreen generated by the Jervis Bay and took his weakly armed vessel into combat with the raider. It was a hopelessly uneven contest and the Jervis Bay was soon reduced to a blazing wreck by the eleven inch guns of the German raider. Out of a ship's complement of 254, only 65 survivors were later rescued by a neutral Swedish merchant vessel. Captain Fegen was not amongst them and he was awarded a posthumous Victoria Cross for his gallantry in attempting to save the convoy.

Although the Admiral Scheer then moved amongst the scattering merchant ships and managed to sink five of them, the remaining ships of the 38 vessel convoy managed to reach Liverpool in ones and twos and so Fegen's sacrifice had not been in vain.

One of the merchant ships damaged in the ensuing melee had been the 12,000 deadweight ton tanker San Demetrio, owned by the Eagle Oil Company and carrying a precious cargo of petrol. She was indeed struck by an eleven inch shell and set ablaze, with her Captain wisely ordering the crew to abandon ship, for a blazing tanker was no place to be and in the circumstances, even the North Atlantic of November posed a better option for survival. One of the two lifeboats, the one containing the ship's master Captain Waite and 25 others, was quickly picked up by another merchant ship from the now scattered convoy but the other boat, containing the Chief Engineer Mr Pollard, the Second Officer Mr Hawkins and fourteen others was not so fortunate and spent the night in the cold Atlantic swell. The following morning, a ship was sighted and knowing that this might prove to be their only chance of rescue, the now exhausted men headed for it; amazingly, it turned out to be their old ship San Demetrio, abandoned, still ablaze but also still afloat. The men took the decision to reboard the ship and despite the rising seas, managed to do so. At first, it was intended to be a temporary measure until either the weather abated, or until they stumbled upon another ship but when the lifeboat was washed from the falls by a heavy sea, the men were effectively stranded on board their own ship.

San Demetrio arrives on the Clyde (John Lewis Jones)

An inspection of the engine room by Mr Pollard soon discovered that a diesel generator could be made to work, thus giving a means of providing pressure for the fire hoses and pumping the engine room dry, following which it was decided that the main engines were still serviceable and that the ship could eventually be made to move under her own power. This was a herculean task given the lack of manpower but it was achieved and three days later, the ship resumed her passage. All of the charts, compasses and other navigational equipment had been destroyed in the shelling and the ensuing fire but with the aid of a school atlas discovered in one of the undamaged cabins and some skilful navigation by Mr Hawkins, San Demetrio was soon heading homewards.

Food and drink for the men was also a major problem but some rum was found on board, as well as plenty of fresh water. Some tea being taken home as a present was also discovered and despite the enormous risk of lighting the galley stove - there were still petrol leaks and vapours in the air - the chance of a hot 'cuppa' lifted morale enormously. Hot food was provided by boiling vegetables in the engine room and although not ideal, proved sufficient to keep the men nourished.

There was one further casualty, when John Boyle, who had been injured during the initial battle, died from internal haemorrhaging two days into the voyage home.

 Poster for the film (Ealing Studios)
On 13th November, San Demetrio made landfall at Black Sod Bay, Eire and by now escorted but still under her own power, she at last reached the Clyde on 15th November, where her precious cargo was offloaded and the men who had salvaged their own ship were able to return to their homes.

The men were awarded salvage money as they had re-boarded and salvaged their own vessel without any outside assistance. The cargo of petrol was worth £60,000 at 1940 prices and the ship, being almost new, was valued at £250,000 and the award of salvage money was spread more or less equally around the men who had re-boarded their ship, including a payment to the estate of John Boyle.

San Demetrio herself was repaired and returned to service but in March 1942, the tanker finally succumbed to enemy attack, this time from a U-Boat and was torpedoed and sunk by U-404 whilst sailing independently to the UK from Baltimore. Sixteen of her crew plus DEMS (Defensively Equipped Merchant Ships) gunners were lost, although there were 32 survivors.

The story of the San Demetrio was a heart warming tale of ingenuity at sea as well as a triumph over adversity that was made into a film by Ealing Studios, simply entitled San Demetrio, London that was released in 1943 and which still gets shown on TV from time to time to this day.


Published Sources:

The Battle of The Atlantic - John Costello & Terry Hughes, Harper Collins 1977
The War at Sea - editor John Winton, Hutchinson 1974

Web Resource:

Arnold Hague Convoy Database