Showing posts with label Merchant Navy. Show all posts

Wednesday, 1 November 2017

Remembering a Charlton hero: The Jim Mackenzie Story

Jim Mackenzie at right of photo (Charlton Athletic Museum)

This blog usually concentrates on events and people from the Second World War but to commemorate Remembrance Week 2017, we look back at the 1914-18 conflict and visit the story of a young man who was one of those involved in the formation of Charlton Athletic FC and whose death took place one hundred years ago this year. This article is a modified version of a piece I wrote last year for the club's museum and is reproduced here with acknowledgements.

Even though Jim Mackenzie was only fifteen years old at the time of the formation of Charlton Athletic FC, he can now be rightly seen as one of the 'Founding Fathers' of the club and to commemorate the centenary of his death, it seems a good time to re-visit his story, which I have been able to update, having unearthed some more information covering his final days.

Although I no longer attend matches as regularly as in previous years due to the various issues connected with the club's ownership, they are still 'my club' and will always be so. Over the years, Charlton Athletic have gained a justifiably superb reputation for community involvement and for our awareness of the club's proud heritage and one such initiative is the excellent Charlton Athletic Museum, an entirely self-funded charity founded and operated by a team of trustees and volunteers.

On an early visit of mine to the museum, my friend, fellow battlefield guide and Addicks fan, Clive Harris drew my attention to what was then a newly produced marble plaque which was to be added to the club's war memorial and which featured the names of the three Charlton Athletic players and officials who lost their lives during the First World War.

Detail of the Charlton Athletic FC Roll of Honour (Author's Photo)

One name, or perhaps rather a ship’s name, immediately caught my attention when looking at the finely crafted plaque. This was the steamship Heron, a name I recognised as being a vessel from the General Steam Navigation Company, a London based short sea and coastal shipping concern that later became a part of the shipping company for whom I once worked, the P&O Group. So apart from the connection to Charlton Athletic, there was also a link, albeit a slightly tenuous one to my first employer, with whom I had spent some of the happiest working years of my life. I had to learn more.

Of course, it wasn’t just a ship’s name on the plaque, for the Heron was merely providing background to the story behind the loss of a human life. The individual’s name was somebody who had been involved with the club literally right from the very start, for he was none other than Jim Mackenzie, the very first Honorary Secretary of the embryonic Charlton Athletic when the club was formed by a group of young lads from the East Street area of Charlton in time for the beginning of the 1905-06 season and whose name and home address at 5 York Street, Charlton was shown in the Kentish Independent newspaper advertisement of 27 October 1905, as the person to contact for potential opponents looking for a friendly fixture.

John Alexander Mackenzie, as his surname suggests, was a Scot, born in 1890 in Dundee to parents William and Annie Mackenzie. Jim, as he seems to have been universally known, was eventually the eldest of five children, with a younger brother and three sisters. By the time of the 1901 Census, the family had moved to 36 Cedar Grove, Charlton as Jim’s father William had taken a job as a Dockyard Labourer, no doubt at one of the many wharves that lined the Thames in the area at that time. By 1905, the family had moved to York Street, today called Mirfield Street and which connected East and West Streets (now Eastmoor and Westmoor Streets respectively) at the heart of the area from whence the young players of the newly formed football club were to be found.

Jim was Honorary Secretary of Charlton Athletic FC during it's formative years but in November 1908 at the age of eighteen, he decided to join the Merchant Navy, being engaged by the General Steam Navigation Company, often referred to simply as the GSN, or ‘The Navvies’. Although the company’s headquarters were at Trinity Square in the City of London, they also had a wharf and engineering works at Deptford, at that time a short tram journey away from Charlton. Perhaps it was the locality of his new employers, together with the relatively short routes covered by the company that attracted Jim to this type of work, which would have permitted him to watch at least the occasional home match when time and voyage schedules permitted.

The s.s. Heron of 1920 - the replacement for the vessel sunk in our story (author's collection)

The 1911 Census found Jim on board the steamship Heron, berthed at Weaver’s Wharf, North Dock, Swansea, when his rank was Mess Room Steward. By 1915, Jim was still aboard Heron and by this time, his rank was shown as the Ship’s Cook. In those days in the Merchant Navy, it was not uncommon for crew members to serve aboard the same vessel for voyage after voyage, for if the seaman was good at his job and conducted himself well, the Ship’s Master would encourage these men to form the nucleus of a trusted and competent crew. We can therefore assume from his long service with the company and aboard the Heron in particular, that Jim was both well liked and a decent Ship’s Cook.

Despite his somewhat nomadic life at sea, Jim kept his roots in Charlton and surely must have kept in contact with his friends at the football club he had helped to set-up during his periods of leave. In the 1911 Census, the family had moved to 93 East Street but by the time the 1913 Electoral Register was printed, the family had moved again to a newer and larger home at 57 Delafield Road, adjacent to Charlton Railway Station and ironically a short walk from what was to become Charlton Athletic’s future home at The Valley.

The Heron was the second of the company’s vessels to bear the name and was an iron hulled steamship of 879 gross register tons delivered to the company in 1889 by Gourlay Brothers of Dundee, so coincidentally the Heron had the same birthplace as her Ship’s Cook and was just a year older. She was engaged on one of the GSN’s regular routes from London and other UK ports to Oporto, carrying general cargo as well as having provision for some passengers. Sadly, no photograph of the vessel seems to have survived the passage of time. The third Heron was built in 1920 and although she was a larger vessel than her predecessor, her general layout was quite similar and gives the reader a good idea as to the type of vessel Jim served aboard.

The First World War saw the emergence of a new form of warfare at sea in the form of the submarine. At the beginning of the Twentieth Century, the submarine had been damned by many and the opinion of Admiral Sir Arthur Wilson RN, who described submarines as “Underhand, unfair and damned un-English” was typical for the time. Attitudes changed however, and by the outbreak of the War in 1914, submarines had been adopted by both the Royal and Imperial German Navies as an integral part of their respective fleets.  

Kapitanleutnant Walter Remy of U-90 (author's collection)

German submarines made an immediate impact in the war, with one notorious incident in September 1914 seeing the loss of the British cruisers Aboukir, Hogue and Cressy with heavy loss of life. The repercussions the following year of the torpedoing of the Cunard liner Lusitania, including the deaths of 128 American civilians, who at that time were citizens of a neutral country, caused the Germans to scale back their submarine operations for fear of further alienating public opinion in the United States and thus drawing them into the war. The submarine flotilla was duly withdrawn from the commerce war and was given strict instructions to attack enemy warships only.

However, on 31 January 1917, with the war beginning to go against Germany and the effect of the Allied blockade having a disastrous effect on food supplies, the Kaiser ordered that unrestricted submarine warfare should be recommenced with immediate effect. As a countermeasure, the British reluctantly instigated a convoy system, initially only on the shorter supply routes to France and across the North Sea but later extended to cover the Transatlantic and Gibraltar routes as well. The exigencies of war meant that there were frequent alterations to loading schedules and diversions to convoy assembly points.

The Heron was no exception in being a part of the new convoy system and having loaded a cargo of coal at Newcastle, topped up with general cargo in London, the little coaster found herself at Falmouth on 27 September 1917 as part of Convoy OF6, which comprised of nineteen vessels bound for Genoa, Gibraltar, Alexandria, Savona, Tunis and Oporto, which was the destination of the Heron, the smallest vessel in the convoy and the only one destined for the Portuguese port. The convoy sailed at 16:00 and was escorted by nine warships of the 4th Destroyer Flotilla under Commander Francis Twigg RN in HMS Lysander, who was the Senior Officer in command of the escort, which comprised the destroyers Porpoise, Hind, Achates, Cockatrice, Unity, Christopher, Brave and Lyra. Considering the size of the convoy, this was a powerful escort on paper but it must be remembered that unlike their Second World War counterparts, the destroyers of this era could not detect submerged submarines whilst they were underway as their hydrophone systems would only work when the destroyers were stopped. The destroyers would therefore hope to catch the submarines on the surface and deal with them either using their gun armament, or as a last resort, by ramming. Conversely, the attacking submarines would often surface at night to sink their prey using their own guns and to avoid wasting torpedoes, which at this time, were not always the most reliable of weapons and could only be guided visually. A large destroyer escort was also required as ships would be detached to cover the merchantmen departing for their individual destinations along the convoy route.

Jim Mackenzie remembered on the Merchant Navy Memorial at Tower Hill (CWGC)

On the night of 30 September whilst crossing the Bay of Biscay, the Heron’s company sister ship, Drake, was sunk by the gunfire of U-90, under the command of 34 year old Kapitanleutnant Walter Remy. The U-90 had only been commissioned at the beginning of August 1917 but Remy was an experienced commander, who had previously commanded the U-24 and who was already responsible for sinking over 31,000 tons of Allied shipping when he took command of his new U-Boat at the Kaiserliche Werft, Danzig. The U-90 was quite a large submarine for the time and displacing 998 tons, was actually slightly heavier than the Heron. She was armed with six 50 centimetre torpedo tubes, four at the bow and two astern and carried sixteen torpedoes. She was also armed with a 10.5 centimetre gun, with 240 rounds for surface attacks.  

The entire crew of the Drake were able to take to the ship’s boats and were eventually picked up the following morning but two hours after her sinking, a single torpedo fired at close range from U-90 slammed into the hull of the Heron adjacent to the engine room and with disastrous results. The impact of a heavyweight torpedo upon the small and elderly iron built coaster must have been devastating, as the Heron with her cargo of coal, sank like a stone. The Engine Room crew along with anyone else caught below decks would not have stood a chance and of the crew of twenty three, there was just one survivor. 

The remaining members of the s.s. Heron commemorated at the Merchant Navy Memorial, Tower Hill (author's photo)

He was a Japanese crane operator by the name of Higo, who had been off duty and taking a bath when the torpedo struck. He quickly realised that the ship was rapidly sinking and ran out on deck, grabbed a life belt and jumped naked over the side. Higo later recalled that it was a beautiful night with a calm sea and bright moonlight. He could hear the cries of other survivors in the water but they were too far away to be visible. After about twenty minutes in the sea, he was picked up by the submarine and a short time later, whilst in captivity but safe aboard the U-90, he was joined by Captain Carter, Master of the Drake, who had also been picked up, doubtless to try and obtain knowledge of the convoy and of the ships they had sunk. 

The remainder of the Drake’s crew were later rescued by the escorts and other ships in the convoy and landed at Gibraltar but of the other twenty two crew members of the Heron, including the 27 year old Jim Mackenzie and of the vessel herself, there was no trace save for a few fragments of wreckage floating on the surface. Jim and his shipmates lay at position 46⁰ 27’ N, 11⁰ 14’ W, some 300 miles southwest of Ushant, in the Bay of Biscay.

The Charlton Athletic FC Memorial and Roll of Honour (Author's photo)

The crew of the Heron represented the British Merchant Navy in microcosm, being a very cosmopolitan bunch.  As might be expected, there were men from England, Ireland, Scotland and Wales on board but there were also crew members from Denmark, India, Portugal and Sweden as well as Japan. Coincidentally, apart from Jim Mackenzie, there was one other resident of Charlton on board; Charles Davey the First Engineer was from Eversley Road, whilst the ship’s Master, Captain RS Bristow hailed from nearby Beckenham in Kent. 

The men of the Heron are commemorated on the Merchant Navy Memorial at Tower Hill, a stone’s throw from the GSN Company’s former headquarters at Trinity Square and where 12,210 British Merchant Seaman from the First World War who have no grave but the sea are remembered. Unfortunately, the panel bearing Jim’s name is located quite high up on the memorial and is difficult to photograph well but is clearly visible to those wishing to pay their respects.

The poem “No Roses Grow on a Sailor’s Grave” could have been written for Jim Mackenzie and his crewmates and it is a fine achievement by the Museum that one of the original ‘East Street Boys’ without whom we would not have a Charlton Athletic, is now commemorated at the home of the football club that he helped to set in motion back in 1905.

The Charlton Athletic Museum is not connected to the club and is run by a volunteer team of trustees and helpers who are committed to preserving the club's heritage and history for a wider audience. The Museum is located within the North Stand at The Valley and is open on Fridays from 11:00 to 15:00 and on matchday Saturdays between 11:00 and 13:00.

Unpublished Sources:

Greenwich Heritage Centre - Metropolitan Borough of Greenwich, Electoral Registers, various 
National Archives - ADM 137/2628 - Admiralty Historical Section: Records used for Official History, First World War: Convoy Records, Outward Convoys Falmouth OF1 - OF21
National Maritime Museum Archives - GSN/1/43 - Minutes of the GSN Company - October 1917
National Maritime Museum Archives - GSN/41/24 - GSN Newsletter issue 93
National Maritime Museum Archives - RSS/CL/1915/3444/12 - ss Heron crew list 1915

Published Sources: 

Birds of the Sea: 150 Years of the General Steam Navigation Company - Nick Robins, published Bernard McCall, 2007
Business in Great Waters - John Terraine, published by Leo Cooper Ltd, 1989
The Story of Charlton Athletic 1905-1990 - Richard Redden, published by Breedon Books, 1990

Monday, 24 July 2017

My thoughts on Dunkirk


As regular readers will know by now, this blog isn't usually in the business of film reviews, so please don't expect a Mark Kermode or Barry Norman style appraisal. As readers will know, I belong to the generation brought up on the classic British war films of the 1950s and 60s and have an in-built suspicion of anything made later than about 1977. In my opinion at least, many of the more recent films of the genre are pretty ordinary and I struggle to take them seriously. It's difficult for me as a military historian and guide to watch these films without forever nit-picking about the accuracy, or lack thereof concerning the uniforms, the equipment, the aircraft, the ships and so forth, at which point my long suffering friends who have been dragged along to watch the film, usually begin to lose the will to live!

However, the new Dunkirk directed by Christopher Nolan is an important work that has attracted much attention and it was because of this that I decided to go along and watch it for myself at the cinema with (hopefully) an open mind.

I still had a fair amount of trepidation and maybe even some misgivings as I entered the Barbican Centre yesterday and perhaps this was because subconsciously, I was allowing comparisons with the 1958 Ealing Studios version of Dunkirk, which starred Richard Attenborough, Bernard Lee and John Mills to prejudice my thinking and was wondering whether the new film would measure up to this British classic.

Firstly - and this doesn't give away any spoilers - the new Dunkirk cannot be compared to the 1958 film as they look at the evacuation of the British Expeditionary Force (BEF) in completely differing ways. The old film tells the story of the whole campaign and covers the fighting withdrawal through Belgium and northern France to the coast and the subsequent evacuation, as well as telling us something of the mood in Britain, of the complacency of the 'Phoney War' period and how people were shaken out of that complacency with a jolt. By contrast, Nolan's work establishes where the British and French allies are inside the opening shots of the film. They have already been defeated and pushed back inside the Dunkirk perimeter, where the armies await evacuation back to England.

The new film contains very little dialogue and is a series of three separate threads that gradually become interlinked. Firstly we follow the stories of two British soldiers, Tommy and Alex played by Fionn Whitehead and Harry Styles (who can act and does so very well) and their various attempts to get home. Next we see the evacuation through the eyes of a small boat owner, Mr Dawson who is assisted by his son Peter and a deck hand, George. Mr Dawson is a plausible character played with great authority by Mark Rylance as are his two young helpers played by Tom Glynne-Carney and Barry Keoghan. The last of the three stories shows the evacuation through the eyes of Farrier and Collins,  two Spitfire pilots played by Tom Hardy and Jack Lowden respectively. In a nice nod to British war films of an earlier era, we hear the voice of Michael Caine as the RAF Fighter Controller coming over the radios of the Spitfires. As would be expected, the Royal Navy features strongly in this film and one of the major supporting characters is Commander Bolton, played by the excellent Kenneth Branagh, who is the Naval Beachmaster in command of the evacuation through the East Mole (a breakwater) in Dunkirk Harbour.

Without giving too much of the plot away, the film follows the attempts of the two soldiers to get away as various ships they are on board are sunk by bombs, torpedo and gunfire in some harrowing and suspenseful scenes before they are eventually rescued by Mr Dawson and his small boat, the Moonstone. On their way to Dunkirk, Mr Dawson and his son rescue a soldier played by Cillian Murphy, who appears to be the only survivor of a destroyer that has been sunk and who is not surprisingly, suffering from severe shock. He at first unwillingly, becomes part of their crew and we see how the Moonstone is first on the scene when one of the Spitfires is shot down and ditches in the sea adjacent to the small boat. Collins the pilot, is rescued just before the aircraft sinks with him inside it and he too ends up helping the others with the evacuation. The Moonstone, along with the remainder of the armada of small boats eventually reach Dunkirk harbour, where they assist in rescuing Tommy and Alex from their sinking minesweeper, as well as the remaining small craft lifting men from the beaches and from the Mole.

There is much more to the plot than this but I do not want to spoil the film for those wishing to see it for themselves. There are, in my opinion, one or two slight holes in the plot and there are some minor criticisms as to the equipment and the look of some of the scenes. For example, we never see more than one large ship alongside the East Mole at any one time and we know that in reality, the breakwater was used extensively by multiple numbers of destroyers, minesweepers and requistioned ferries. This can probably be explained by budgetary restraints and the director's aversion to using CGI in his films, so this criticism can be tempered by Nolan's quest for realistic looking scenes. Another small gripe is that the beaches never quite looked crowded enough for me, although this can probably be answered in a similar way - you can only have so many extras and the days of a "cast of thousands" are probably long gone. Some of the equipment is not quite right but it is not possible to find an authentic 1940 vintage destroyer or minesweeper without resorting to CGI - the vessels used do by and large, have the right look to them. Also, in one scene, we see container cranes in the background when we are supposed to be in 1940, some thirty years or so before the invention of the shipping container - could these not have been airbrushed out of the picture?

We also see the three Spitfires buzzing across the Channel at wavetop height - this is absurd, as for them to enter into any sort of air combat with the Luftwaffe, they would need to be at height in order to have any sort of advantage with the Bf109s that they were likely to encounter. This was the main reason for the perception amongst the soldiers of the BEF that the RAF were not there to protect them. Of coure, the RAF were there but much of their combat with the Luftwaffe took place at high altitude or inland from the beaches. The Spitfires in the film also seem to have an unlimited supply of ammunition for their machine guns, when in reality the Mark 1 only had enough for fourteen seconds firing. There is also too much emphasis placed on the role played by the 'Little Ships', which in reality were only responsible for lifting between five and seven percent of the total number of 338,226 British and French soldiers evacuated, although they did perform vital work in ferrying men off the beaches. The vast majority of those evacuated were lifted from the Mole at night by the Royal Navy destroyers and minesweepers, as well as the requisitioned ferries and excursion steamers of the Merchant Navy and in this respect, the film does perpetuate the myth of the Little Ships of Dunkirk. My only other very slight criticism is not specifically aimed at this film but is a more general complaint in that it is extremely loud. I know war is loud but whenever I see any film in the cinema these days, the volume in the theatre does always seem to be set at level eleven but perhaps this is more to do with the vagaries of my ears rather than anything else!

However, the above are minor criticisms in the scheme of things and there are a whole lot more positives than negatives about this film. Much of the location filming was shot in and around Dunkirk and that counts for much with me, at least. The three Spitfires we see are all Mark 1s, absolutely authentic for the period. Amongst the ships used for the film, we see MTB 102, which in reality was one of the final vessels to leave Dunkirk in June 1940 and some twelve of the surviving 'Little Ships' were also used in various scenes to recreate the evacuation.

The film is also extremely respectful to the period as well as to the people of this time and succeeds in capturing something of the real spirit of 1940. Also, although there are some understandably harrowing scenes of battle and of ships sinking - it would be impossible to make a film of this nature without showing people getting killed - it is done in a restrained way. There is no gratuitious blood and gore in the way that some recent war films seem to delight in. 

In one important respect, this film does resemble the 1958 version of Dunkirk, as well as many other British war films of the period, in that it is extremely understated and almost modest in the portrayal of events that helped shape history and director Christopher Nolan together with his cast and crew are to be congratulated on having achieved this, especially as this is an American production that covers events from a British perspective during a period that was long before America entered the war.

As has to be the case with any film portraying real life events, much of the action is compressed and many of the characters are amalgams of several real people. For example, Branagh's character, Commander Bolton appears to be a mix of Captain Bill Tennant, the Senior Naval Officer at Dunkirk and of Commander James Campbell Clouston, a Canadian officer in command of the East Mole, who was drowned when his motor launch was bombed and sunk whilst returning to Dunkirk from Dover after a short rest period. Mark Rylance's character, Mr Dawson seems to be at least in part based upon Charles Herbert Lightoller, one time Second Officer of the Titanic, who survived that particular disaster and who in retirement, took his yacht named Sundowner, across to Dunkirk with his son as a deck hand and rescued the implausibly large number of 130 soldiers, squeezed into the cabin and on deck. On arrival back at Ramsgate, the men filed out in a seemingly never ending stream, at which point a bystander suddenly said to Lightoller "God's truth mate, where did you put them all?" a line that is repeated in the film. Some of the exploits of the Spitfire pilot played by Tom Hardy appear to be at least in part based on Al Deere, the New Zealander who became a Battle of Britain 'ace' and who also took part in fierce air combat over Dunkirk.

There was one scene towards the end of the film that even had this cynical old military historian slightly moist eyed. As they disembark from the Moonstone at Dover, one of the young soldiers we have been following and who is by now caked in oil and dirt says to an elderly man who is handing out blankets "I'm not a hero, all I've done is survive." The old man, who we assume is himself a veteran of the previous conflict replies "Well, that's good enough - well done!"

If you haven't yet seen this film, I urge you to do so as I feel it is a respectful and moving tribute to all of those who took part in the real life evacuations some seventy seven years ago.

Monday, 27 February 2017

His Majesty's Stationery Office at War

One of the many bonuses of my job as a guide, speaker and researcher is being able to indulge myself in one of my old hobbies of collecting old books, although this is something of a double-edged sword, as my home is rapid becoming submerged in an ever growing tide of books both old and new. Indeed, one item firmly on the agenda for 2017 is to build some new bookshelves.

One of the publications I have found myself collecting over the years are the excellent and numerous series of wartime booklets published by HMSO, or His Majesty's Stationery Office to give this organisation it's correct title.

It would be easy to dismiss these works as mere propaganda but this would be to do them a great disservice; of course they tell the stories from a staunchly pro-Allied point of view but there is a great difference between these works and the blunt nature of the works put out by the HMSO's Nazi counterparts. For one thing, the British works do tend to tell things pretty much as they were and some of the photographs pull no punches. For example, in the first of these booklets I acquired, Front Line 1940-41, which tells the story of Britain's Civil Defence Services during this time, the images of destroyed buildings, injured civilians and people being rescued are all real enough and are in no way "manufactured" shots for the benefit of the book. The narrative, although understandably of its time, is thoughtful and well-written and leaves nobody in any doubt that the country has suffered grievously. The underlying message of course, is a positive one - that although times are hard, everything will eventually come right. The books themselves are a masterpiece of good design - the covers are innovative and the standard of some of the photography is first class. The price of these little booklets varied depending on the size of them but were generally between 6d and 2 shillings (between 2 1/2 and 10 pence in today's money) and were an invaluable way for the British public to keep up with events during the wartime years.

Not strictly an HMSO publication but one in which they doubtless had an input is Fire Over London, which tells the story of the London Fire Service during the Night Blitz of 1940-41. Published by the London County Council, who were about to relinquish control of the capital's Fire Brigade into the nationalised National Fire Service, it is a slimmer volume at 34 pages in comparison to most of the HMSO publications, which were generally around the 100 page mark but follows a similar format. It starts with a brief summary of the wartime Fire Service and of the preparations that had been made for war, before going into an account of events of some of the various great raids on London up to that point - 'Black Saturday' 7th September 1940, 'The Second Great Fire of London' 29th December 1940 and the heaviest raid of them all on the night of 10th/11th May 1941. It also tells us of the different types of bomb dropped by the Luftwaffe and gives an insight as to how various types of fires were tackled and as with the HMSO booklets, it is well illustrated with some fascinating photographs. Once again, this is not by any means a piece of blunt propaganda.

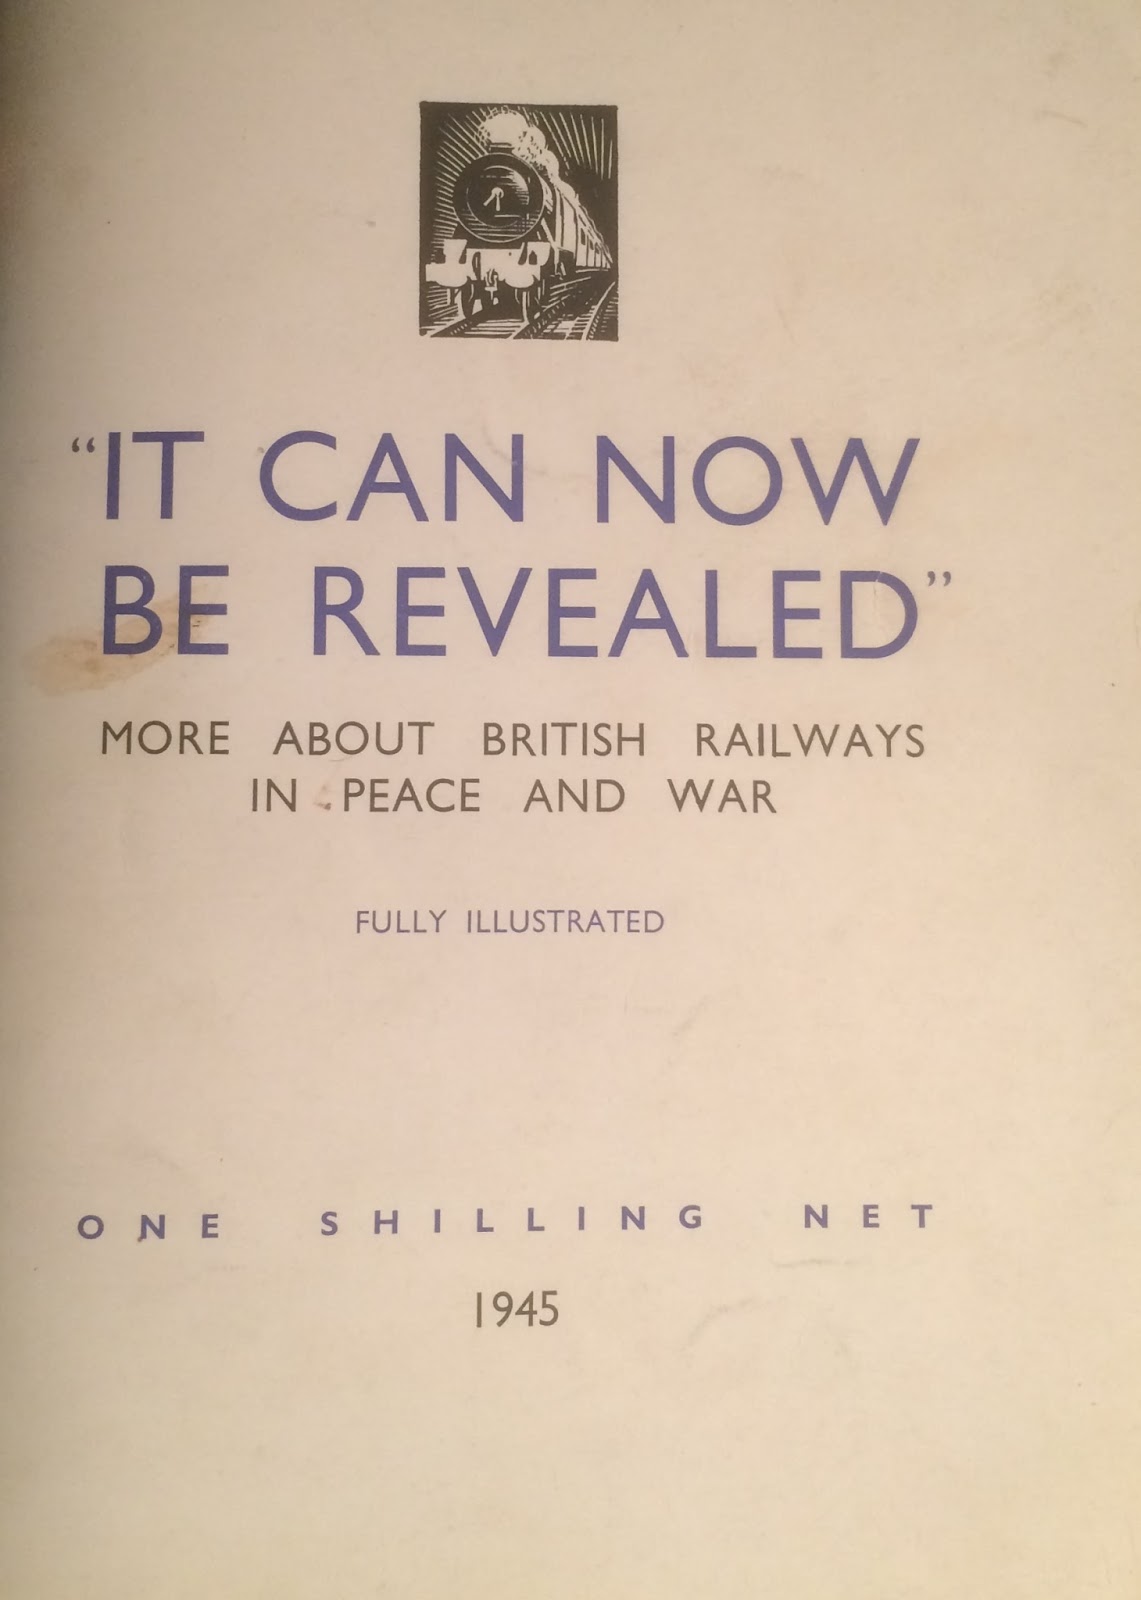
Another non-HMSO publication but one with which they undoubtedly were involved is It Can Now Be Revealed published in 1945 on behalf of the four major railway companies - GWR, LMS, LNER and Southern Railways, together with London Transport - by the British Railways Press Office. This is an early use of the phrase 'British Railways' as the railways were not to be nationalised until 1948 but had been effectively under state control during the wartime years under the Railway Executive Committee. Interestingly, each of the railway companies, plus London Transport were to publish their own wartime stories in the early years of peacetime but this is another well written piece, which apart from telling us of the railways' work during the recent war, also tells us something of the plans for peace. The booklet starts by telling us not of railway operations but of the war work undertaken by the railway companies - of building tanks, Halifax bombers and Horsa gliders, anti-aircraft guns and even motor boats. This section reminds us that the railway companies contained superb in-house heavy engineering and manufacturing capabilities, all of which were put to good use to aid the war effort. We then turn to the railways themselves and the arrangements put in place for handling child evacuees, war workers, troop movements and war production. We then look at the preparations and arrangement for D-Day, which as well as being the largest sea-borne invasion of all time, was probably the greatest logistical achievement ever likely to be undertaken. The booklet then closes by telling us the work undertaken to maintain services during the V-Weapons campaigns of 1944-45 as well as something of rebuilding for the future.

Staying with the Civilian Services for now, we turn to Merchantmen at War, an HMSO publication that tells the story of Britain's Merchant Navy and the great convoy battles of the war. The booklet starts by telling us of the men of the sea, the Masters, Chief Engineers, officers and men and also tells us of the diversity amongst the crews of the British Merchant Fleet and reminds us that many of the seamen came from places as widespread as Sierra Leone, Bombay and Mombasa. We learn of the convoys themselves, the pre-sailing conferences and of the cargoes themselves, which could be anything from foodstuffs to vital wartime supplies of raw materials and finished products such as tanks, aircraft and ammunition. Like the other booklets, it pulls no punches and there are some pretty graphic photographs of ships being torpedoed and men being rescued who were clearly at the limits of their endurance. We learn of the Arctic Convoys, which were arguably the most arduous of all and finally we see the 'turn of the tide' the preparations for the various landings at Sicily and Normandy. As someone who served in the Merchant Navy in a small way during the 1970s and 80s, this is a fascinating account of a subject close to my own heart.

The fighting services are not ignored either and there is comprehensive coverage of various aspects of the 'sharp end' of the war. A recent acquisition courtesy of the excellent David JB Smith aka @NavalAuthor on Twitter (with whom some swapping of doubles was done), is The Mediterranean Fleet, which is the Admiralty's account of Naval operations in that theatre from April 1941 to Janaury 1943. Like all of the others, this is well written with a copious amount of illustrations and covers some of the hardest moments such as the evacuations from Crete and Greece and the losses of such ships as HMSs Ark Royal, Barham and York, as well as the Malta Convoys, to the more triumphant moments such as the victories at Cape Matapan and Sirte. Once again, the standard of photography is outstanding and leaves the reader in no doubt that before the final victories, there were many moments of tragedy along the way. Some of the photographs of the sinking of HMS Manchester are particularly hair raising and it is hard to imagine anything nearly so candid being published in Nazi Germany at any stage of the war.

Neither are our various Allies forgotten in these booklets either and another recent acquisition  focuses on the exploits of Queen Wilhelmina's Navy or the Royal Netherlands Navy to use the correct title. At twenty five pages, this is a slimmer volume but like the others described earlier, is still well-written and contains a large number of excellent photographs. In common with the other booklets in the series, the narrative doesn't just provide the reader with mindless propaganda but also speaks candidly of the defeat and losses suffered when the Netherlands were invaded and how the Dutch Navy fought a brave delaying action. Despite the loss of their homeland to the German invaders, the Navy fought on and suffered further heavy losses when the Japanese entered the war and attacked Dutch colonies in the East Indies and the booklet tells of the heroic defeat of Admiral Doorman's combined Dutch, American and British force at the Battle of Sunda Straits. Like the other booklets reviewed above, this one also ends on a hopeful note and tells of the Dutch Navy's ongoing fight against both Germany and Japan and looks forward to the day when they will be able to return to a liberated country.

Staying with the Allied theme, Target: Germany examines the work done by the United States 'Mighty Eighth' Air Force in it's first year of operations over Europe. The booklet in my possession is marked "British Edition" so this was clearly something produced for consumption on both sides of the Atlantic. The narrative here starts with the description of two  daylight raids (all American raids were in daylight) on a synthetic rubber factory at Huls as well as the General Motors' factory in Antwerp and tells of how important it was for the American bombers to stick in a close defensive formation. As before, the narrative is quite candid in it's descriptions of massed attacks by German fighters, of bombers exploding and of others coming down in the Channel and the crews awaiting rescue by the British Air-Sea Rescue services. The chapter closes with the post-mission interrogation of the surviving crews and the questions asked of them. Next, we read about the comparisons between the two main American heavy bombers used, the B-17 Flying Fortress and the B-24 Liberator, such as relative bomb loads, speeds, defensive armaments etc. The next chapter steps back in time and gives us the background of the raison d'etre of the Eighth Air Force and the early developments in it's formation and deployment to Britain. All in all, this is another quality piece of work and whilst the narrative is perhaps the most 'gung-ho' of all those reviewed thus far, it is also fairly candid in it's descriptions and like the other books, the standard of the photography is first class.

Staying with the theme of air power, our next booklet RAF Middle East concentrates on the work of the Desert Air Force and air operations in the Middle Eastern Theatre of War from February 1942 to January 1943. This volume tells of operations primarily in the North African desert but also covers the defence of Malta. We hear descriptions of the unique conditions encountered in the desert that made flying so difficult and the maintenance of aircraft challenging in the extreme. Like most of the other volumes, we read descriptions of the early reverses and the back and forth struggles across the desert during this most fluctuating of wartime theatres. The siege of Tobruk is covered as is the later fall of this supposed fortress-port. Air operations in support of the British Eighth Army at Alamein are covered in some detail, when probably for the first time there was really close and effective co-operation between the British Army and Royal Air Forces. This was one of Montgomery's finest achievements and was something of which all those involved could be justly proud. The booklet closes with the pursuit of the Afrika Korps across the Western Desert until their final surrender in Tunisia. Once again, the narrative is truthful and speaks of the reverses as well as the triumphs and the standard of photography is excellent.

We stay in the desert for our next HMSO publication for The Eighth Army which covers this Army from it's official formation in September 1941 through to the brink of final victory in that theatre during January 1943. When the Eighth Army was formed, British fortunes in North Africa were at a low ebb following the earlier brilliant successes achieved by General Wavell's Western Desert Force against the Italians early in the war. Wavell was replaced by General Auchinleck and the book really opens by describing The Auk's (as he was nicknamed) first offensive in November 1941. The book makes a point of describing the cosmopolitan nature of Eighth Army, as besides men from all of the home nations of the British Isles, there were soldiers from Australia, India, New Zealand and South Africa. We again hear of the siege of Tobruk, this time obviously from the point of view of the men on the ground. The book tells us of the great advances and retreats that symbolised this campaign before the Army settled on it's defensive line at El Alamein. It was at this point that Churchill decided on another change of command and Auchineck was relieved both as Commander in Chief, Middle East and as General Officer in Command of Eighth Army. He was replaced by Alexander in the former position and the then little-known (outside the Army) Bernard Law Montgomery as Eighth Army Commander. After halting the Afrika Korps at Alam Halfa inSeptember 1942, Montgomery's thoughts turned to the offensive and the booklet covers the ensuing Battle of El Alamein in some details but perhaps understandably considering when the book was written, does not cover any of the later controversies with regard to Monty's perceived over-cautious approach to battle. Seemingly after years of defeats on land, the British at last had a winning General and would not allow dissent in an official publication!

We close by looking at a regiment which formed an integral part of Eighth Army and in The Royal Armoured Corps published in 1945, the narrative gives a brief account of the formation of the regiment during the First World War following the invention of the tank and tells us of how Germany embraced the tank under Hitler and of the early British defeats in France during 1940, during which campaign the Royal Armoured Corps was one of the relatively few parts of the British Army to come out with credit, although they were to lose the majority of their equipment during the hurried retreat and subsequent evacuations. We then learn of the regiment during the Western Desert campaign and the rapid expansion caused by the massive influx of wartime conscripts. There follows a detailed account of the recruiting and training process. The book closes with accounts of the victorious battles in the desert as well as the return to France in 1944 and the future advance into Nazi Germany. Although published in 1945, the book was clearly written in mid 1944 before final victory was achieved but like the other HMSO publications described above, this is a candidly written and well illustrated account.

There is a seemingly endless list of these HMSO booklets and I have yet to see the publications covering the Battle of Britain, RAF Bomber Command, The Fleet Air Arm, His Majesty's Submarines, His Majesty's Minesweepers, The Royal Marines, Australian Forces, Coastal Command and Combined Operations amongst many others that are out there. So far, my acquisitions have come from junk shops, internet auction sites, swaps and the odd gift from friends who know what a sad character they have befriended. They are a fascinating view of the war as written at the time.


HMSO Publications:

The Eighth Army: September 1941 to January 1943 - published 1944 
Fire Over London: The Story of the London Fire Service 1940-41 - published by the London County Council, August 1941
Front Line 1940-41 - published 1942
It can now be revealed: More about British Railways in peace and war - published 1945
The Mediterranean Fleet: Greece to Tripoli - published 1944
Merchantmen at War - published 1944
Queen Wilhelmina's Navy - published 1944
RAF Middle East - published 1945
The Royal Armoured Corps - Through mud & blood to the green fields beyond - published 1945
Target: Germany - The US Army Air Forces' official story of the VIII Bomber Command's first year over Europe - published 1944


Tuesday, 5 November 2013

San Demetrio, London

mv San Demetrio (Crown Copyright)
In November 1940, although the Battle of Britain had officially ended, the people of Britain's towns and cities were settling down to a long winter of bombing that they would have to endure throughout the long nights of winter right through until the spring of 1941 when at last, Hitler's eyes would begin to turn eastwards to fresh conquests against his erstwhile ally, the Soviet Union.

Apart from the hardships brought about by the Blitz, the British public were starting to feel the pinch of the rationing of all sorts of products from foodstuffs to fuel. This shortage of petrol had already forced the majority of private cars off the roads and what petrol as could be imported was mainly reserved for the war effort. The fall of France in June 1940 had brought the major ports along France's Atlantic coast into the hands of the Germans and the vessels of the Kriegsmarine no longer had to make the perilous and fuel consuming voyage through the North Sea or the Greenland-Iceland-UK Gap in order to reach the rich pickings of the Atlantic convoys.

Prior to the fall of France, convoy after convoy had sailed safely across 'The Pond' without ever seeing a submarine or a surface raider but this had now all changed and the supplies to Britain and her Empire, at this time standing alone against the Nazi threat, were suddenly in danger of being cut off. 

Today, when asked about the Battle of the Atlantic, most people would imagine that the threat came solely from the U-Boats and to a great extent, this is true but in the early years of the war especially, there was also a substantial danger posed by surface raiders such as the so-called 'Pocket Battleships' of the Admiral Scheer class. One of these, the Graf Spee, had already been hunted down and destroyed in December 1939 giving the Royal Navy it's first major victory of the War. However, this victory had come after the raider had created havoc and alarm amongst British merchant shipping in the southern sea lanes. 

Now, another raider was at large; Admiral Scheer was prowling the North Atlantic in search of easy pickings in the form of either unescorted merchant ships, or the still woefully under-escorted convoys that were streaming across from Halifax, Nova Scotia.

Admiral Scheer (US Naval Historical Center)

One such convoy was HX84, which had sailed from Halifax on 28th October 1940 and by 5th November was well into it's voyage, which was intended to end at Liverpool around the 11th November. For these early convoys of the war, the close escort was pitifully weak and at this mid-Atlantic stage of the convoy, consisted solely of the Armed Merchant Cruiser, Jervis Bay, under the command of Captain ESF Fegen RN, which in spite of it's impressive sounding title, was basically a converted passenger ship of the Aberdeen Commonwealth Line, which had been requisitioned by the Royal Navy and hastily armed with seven 1898 vintage six inch guns as well as a couple of three inch anti aircraft guns from First World War stocks. It was intended to reinforce the escort for the final leg of the voyage into Liverpool but in the meantime, Captain Fegen and the remainder of the convoy waited anxiously in hope that there would be no fireworks on the 5th November.

As darkness fell, these hopes were dashed as the Admiral Scheer discovered the convoy and began approaching in the expectation of easy pickings. Despite being hopelessly outgunned, Fegen ordered the convoy to scatter under cover of a smokescreen generated by the Jervis Bay and took his weakly armed vessel into combat with the raider. It was a hopelessly uneven contest and the Jervis Bay was soon reduced to a blazing wreck by the eleven inch guns of the German raider. Out of a ship's complement of 254, only 65 survivors were later rescued by a neutral Swedish merchant vessel. Captain Fegen was not amongst them and he was awarded a posthumous Victoria Cross for his gallantry in attempting to save the convoy.

Although the Admiral Scheer then moved amongst the scattering merchant ships and managed to sink five of them, the remaining ships of the 38 vessel convoy managed to reach Liverpool in ones and twos and so Fegen's sacrifice had not been in vain.

One of the merchant ships damaged in the ensuing melee had been the 12,000 deadweight ton tanker San Demetrio, owned by the Eagle Oil Company and carrying a precious cargo of petrol. She was indeed struck by an eleven inch shell and set ablaze, with her Captain wisely ordering the crew to abandon ship, for a blazing tanker was no place to be and in the circumstances, even the North Atlantic of November posed a better option for survival. One of the two lifeboats, the one containing the ship's master Captain Waite and 25 others, was quickly picked up by another merchant ship from the now scattered convoy but the other boat, containing the Chief Engineer Mr Pollard, the Second Officer Mr Hawkins and fourteen others was not so fortunate and spent the night in the cold Atlantic swell. The following morning, a ship was sighted and knowing that this might prove to be their only chance of rescue, the now exhausted men headed for it; amazingly, it turned out to be their old ship San Demetrio, abandoned, still ablaze but also still afloat. The men took the decision to reboard the ship and despite the rising seas, managed to do so. At first, it was intended to be a temporary measure until either the weather abated, or until they stumbled upon another ship but when the lifeboat was washed from the falls by a heavy sea, the men were effectively stranded on board their own ship.

San Demetrio arrives on the Clyde (John Lewis Jones)

An inspection of the engine room by Mr Pollard soon discovered that a diesel generator could be made to work, thus giving a means of providing pressure for the fire hoses and pumping the engine room dry, following which it was decided that the main engines were still serviceable and that the ship could eventually be made to move under her own power. This was a herculean task given the lack of manpower but it was achieved and three days later, the ship resumed her passage. All of the charts, compasses and other navigational equipment had been destroyed in the shelling and the ensuing fire but with the aid of a school atlas discovered in one of the undamaged cabins and some skilful navigation by Mr Hawkins, San Demetrio was soon heading homewards.

Food and drink for the men was also a major problem but some rum was found on board, as well as plenty of fresh water. Some tea being taken home as a present was also discovered and despite the enormous risk of lighting the galley stove - there were still petrol leaks and vapours in the air - the chance of a hot 'cuppa' lifted morale enormously. Hot food was provided by boiling vegetables in the engine room and although not ideal, proved sufficient to keep the men nourished.

There was one further casualty, when John Boyle, who had been injured during the initial battle, died from internal haemorrhaging two days into the voyage home.

 Poster for the film (Ealing Studios)
On 13th November, San Demetrio made landfall at Black Sod Bay, Eire and by now escorted but still under her own power, she at last reached the Clyde on 15th November, where her precious cargo was offloaded and the men who had salvaged their own ship were able to return to their homes.

The men were awarded salvage money as they had re-boarded and salvaged their own vessel without any outside assistance. The cargo of petrol was worth £60,000 at 1940 prices and the ship, being almost new, was valued at £250,000 and the award of salvage money was spread more or less equally around the men who had re-boarded their ship, including a payment to the estate of John Boyle.

San Demetrio herself was repaired and returned to service but in March 1942, the tanker finally succumbed to enemy attack, this time from a U-Boat and was torpedoed and sunk by U-404 whilst sailing independently to the UK from Baltimore. Sixteen of her crew plus DEMS (Defensively Equipped Merchant Ships) gunners were lost, although there were 32 survivors.

The story of the San Demetrio was a heart warming tale of ingenuity at sea as well as a triumph over adversity that was made into a film by Ealing Studios, simply entitled San Demetrio, London that was released in 1943 and which still gets shown on TV from time to time to this day.


Published Sources:

The Battle of The Atlantic - John Costello & Terry Hughes, Harper Collins 1977
The War at Sea - editor John Winton, Hutchinson 1974

Web Resource:

Arnold Hague Convoy Database 


Friday, 15 February 2013

The Navy's Here!

Philip Vian (Official Photo)
This weekend marks the seventy second anniversary of what at the time was described as the 'Altmark incident', a bold rescue by the Royal Navy that made headlines around the World, partly because the land war was stuck in the period subsequently known as the 'Phoney War' but also undoubtedly due to the sheer panache and determination shown by the Senior Service in the execution of this adventure which would not have looked out of place on the pages of the Boy's Own Paper.

In the early months of the war, the German pocket battleship and commerce raider Graf Spee had been patrolling the South Atlantic taking a heavy toll of British merchant shipping which was described in the December 2011 edition of this blog. The Graf Spee herself was sunk in December 1939 by the British cruisers Ajax, Achilles and Exeter but during her earlier sinking spree, many prisoners from the sunken merchant ships had been taken and although they had at first been kept aboard the German raider, there was soon no room for any more, so the decision was taken to transfer the bulk of the prisoners to Graf Spee's supply ship, Altmark for eventual passage back to Germany and a prisoner of war camp. The Merchant Navy officers were the exception and remained aboard Graf Spee under the stewardship of her captain, Hans Langsdorff, a humane and honourable man who took pains to keep his prisoners in decent conditions. After the River Plate battle, when the pocket battleship fled into Montevideo, these officers were released unharmed and eventually returned home. 

In contrast with Langsdorff's prisoners, those merchant seamen unfortunate enough to be transferred to the Altmark found themselves in the custody of a committed Nazi Heinrich Dau, who despite Langsdorff's orders to the contrary, kept his almost three hundred prisoners in squalid conditions in one of the vessel's holds. Altmark had slipped away from her last rendezvous with the German raider before her final battle and was heading back towards Germany, hoping to do so undetected.

The prisoners released from Graf Spee in Montevideo had informed the British authorities as to the fate of their erstwhile shipmates and from that moment, the hunt was on for the supply ship. At first, Altmark eluded the British patrols; her guns had been removed and to all appearances, she looked like an innocent tanker. She arrived off Trondheim, in then neutral Norway on February 14th and having then entered Norwegian territorial waters, under international law, Dau was obliged to set his prisoners free, just as the honourable Langsdorff had done when his ship arrived in the neutral waters of Uruguay in the previous December. Dau, however was not Langsdorff and he kept his prisoners concealed below decks, hoping to get them back to Germany.

HMS Cossack (Crown Copyright)
Aided by a reconnaissance photo taken by a Coastal Command Lockheed Hudson aircraft, the Royal Navy by now had got wind of Altmark's arrival off Trondheim and a strong force under the command of Captain Philip Vian in the destroyer HMS Cossack was steaming to intercept the German vessel. After a fruitless chase of another vessel which turned out to be an innocent (and neutral) Swedish merchantman, a sharp-eyed lookout on the cruiser HMS Arethusa spotted the Altmark hugging the Norwegian coast inside Josing Fjord, well inside territorial waters. At this point, the Norwegians, anxious to preserve their neutrality, placed two of their patrol boats either side of the Altmark, in order to prevent the British from boarding her. The British, equally anxious not to provoke an incident but equally determined to get their prisoners returned to them, insisted that the Norwegians carry out an inspection of the German vessel.

On the 15th February, Norwegian Naval officers inspected the Altmark and despite the prisoners in the hold making a huge commotion, they failed to inspect the hold and indicated that they would allow the German vessel to proceed on her way. Whilst this inspection was taking place, Vian had radioed the Admiralty, then under the command of First Lord, Winston Churchill, for further instructions and received the following reply:

Unless Norwegian torpedo-boat undertakes to convoy Altmark to Bergen with a joint Anglo-Norwegian guard on board, and a joint escort, you should board Altmark, liberate the prisoners, and take possession of the ship pending further instructions. If Norwegian torpedo-boat interferes, you should warn her to stand off. If she fires upon you, you should not reply unless attack is serious, in which case you should defend yourself, using no more force than is necessary, and ceasing fire when she desists. 

Altmark's dead being taken ashore (www.norgeslexi.com)
With these clear instructions, the die was cast and the following day, Vian made his move. He manoeuvered Cossack alongside the German vessel despite Dau's strenuous efforts to avoid being found out - Dau attempted to ram Cossack by moving full astern but all he managed to achieve was to run his own vessel aground. Vian sent a powerful boarding party under the command of Lieutenant Turner aboard Altmark, armed with rifles, bayonets fixed and cutlasses - it is thought to be the last time that the Royal Navy used cutlasses in action - and quickly overpowered the German crew. During the brief action, six of the Altmark's crew were killed and a further eight, fleeing across the ice, were shot and wounded by the British boarding party. Once the fighting was over, Turner and his boarding party was able to concentrate on the business of finding the prisoners, who were being held under locked hatches in the hold. When these had been broken open, Lieutenant Turner shouted down "Any British down there?" He was greeted with a tremendous shout of "Yes, we're all British!" Turner responded with the now immortal words, "Come on up then, the Navy's here!"

Vian and his men had rescued two hundred and ninety nine British merchant seamen from captivity.

Dau and his surviving crew were not captured by the British, who anxious not to antagonise the Norwegians any further, left their territorial waters shortly after midnight on the 17th February. It had been their original intention to tow Altmark to a Scottish port as a prize of war but the fact that she had run aground precluded this and after the British had left, the German survivors reboarded her and she was eventually salvaged, renamed Uckermark and resumed her duties as a supply ship for the Kriegsmarine. In November 1942, whilst moored in Yokohama harbour Japan, she was destroyed by a huge explosion, thought to have been caused by the ignition of fumes from her recently discharged cargo of gasoline. Fifty three of her crew died in the explosion but Dau was not amongst them, having been unceremoniously retired some months previously. Dau took his own life on the day of Germany's surrender in May 1945.

Some of the 299 rescued prisoners coming ashore (HMS Cossack Association)
HMS Cossack arrived in Leith, Scotland later on 17th February to a rapturous welcome. Her prisoners were quickly ashore and apart from those who needed medical attention were soon on their way home to their families.

The Altmark Incident was the beginning of what was to be a long and tough war for Captain Vian. For his actions in rescuing the Altmark prisoners, he was awarded the DSO and later, still in Cossack, his flotilla was in action against the Bismarck in May 1941. Promoted to Rear Admiral soon after this action, Vian's first action as a flag officer was to command the raid in September 1941 on Spitzbergen. He was then sent to the Mediterranean to command a cruiser squadron and he saw tough service on the Malta convoys, including both Battles of Sirte and surviving having his flagship, HMS Naiad, sunk underneath him in March 1942. Later he commanded the Eastern Task Force on D-Day and later still, promoted to Vice Admiral, he commanded the British Pacific Fleet's aircraft carrier squadron in many battles against the Japanese. Post war, he retired from the Navy as Admiral of the Fleet in 1952 and died in May 1968. He is buried in the Crypt of St Paul's Cathedral.

Despite these great endeavours, Vian will probably always be remembered for his instrumental role in the Royal Navy's last major boarding party action.

Published Sources:

Action This Day - Admiral of the Fleet Sir Philip Vian, Muller 1960   
The Battle of The Atlantic - John Costello & Terry Hughes, Collins 1977
The Battle of The River Plate - Dudley Pope, Secker & Warburg 1987
Engage the Enemy More Closely - Correlli Barnett, Hodder & Stoughton 1991

Thursday, 22 December 2011

1939: The first wartime Christmas, The Phoney War and a victory at sea

The Graf Spee (Bundesarchiv)
The winter of 1939 was to prove one of the coldest for many years. In Germany there was thick ice in the Baltic, the Kiel Canal and the Rivers Elbe and Jade which hampered trade almost as much as the British naval blockade, which was beginning to affect the supply of food and essential products into the Reich. In France, the soldiers of the newly arrived British Expeditionary Force found the ferocity of the winter had frozen the ground so hard that they were unable to make much progress in digging the trenches and defensive systems that were seen as essential to the sort of war they were expecting to have to fight. In December 1939, the BEF introduced a forces’ leave service so that at least some of the men who had been in France since the previous September were able to spend Christmas at home with their families.

At home in Britain in December 1939, people were beginning to come to terms with the blackout. In September 1939, the casualty figures for road traffic accidents had increased by almost 100 percent over peacetime figures. This didn’t include people who suffered from other blackout-related mishaps, such as falling from railway platforms, walking into canals or falling down steps. By December, the imposition of more severe petrol rationing forced most private cars from the road, so traffic accidents began to decrease almost by default. A slight relaxation in the blackout also permitted civilians to carry hand torches, albeit masked but sufficient to help in finding one’s way around more safely. The dance halls, cinemas and theatres were packed out once again but the cold weather was beginning to play havoc with the public transport system; some main line express trains from Scotland and the north of England ran over a day late!

Although there had been no actual air raids over British cities by December 1939, there was no shortage of alerts, which showed up the many flaws and deficiencies in the ARP system, some of which were still apparent when the shooting war started in the spring and summer of 1940. This then, was the "Phoney War."

At sea however, this phrase was an anathema to the men of the Royal and Merchant Navies. The first ship to be sunk was the liner Athenia, torpedoed by Fritz Julius Lemp in the U-30 with heavy loss of life on 3rd September, just hours after the declaration of war. The Royal Navy had also suffered an early loss when the aircraft carrier HMS Courageous had been torpedoed by U-29 with the loss of 519 officers and men, including her captain. The Royal Navy had begun to sink U-Boats and was beginning the long and painful battle to overcome this menace but in December 1939, despite these and other high profile sinkings, the U-Boat was not a major threat. There were insufficient numbers of ocean-going submarines and without the French Atlantic coast bases that the Germans were later to capture, those submarines that were in commission did not yet have the direct access to the Atlantic convoys that was later to cause such carnage to Britain’s life lines.

In December 1939, the main threat to Britain’s merchant fleet came from the surface raider. Apart from the converted merchant vessels that tended to prey on vessels sailing alone, the Kriegsmarine had three specialised Panzerschiffen, known to the rest of the World as ‘pocket battleships’, so called because they were not armed quite to the same level as the conventional battleship but still powerfully equipped with six 11 inch guns and a heavy secondary armament. They were powered by diesel engines which gave a speed in excess of most British heavy units and more importantly gave these vessels a tremendous level of endurance, especially when operating in tandem with a supply tanker, meeting at pre-arranged rendezvous points in the open ocean.

One such vessel, the Graf Spee (pictured at top), under the command of Kapitan Hans Langsdorff (pictured below), had sailed from Wilhelmshaven shortly before the outbreak of war, on the 20th August 1939 and had been undetected as she sailed via the Norwegian coast and through the Denmark Strait into the Atlantic and her war station in the South Atlantic. The British only realised that she had sailed on the 31st August, some eleven days after she had departed. By then it was too late; units of the British Home Fleet patrolled the area around Norway and the Shetlands but Graf Spee was long gone and especially in these pre-radar days, finding a ship in the Atlantic that did not want to be discovered was like the proverbial needle in the haystack story.


Hans Langsdorff (Bundesarchiv)
It was only when British merchant ships began to disappear in the South Atlantic, around the Cape, off the coast of Lourenco Marques and finally off the coast of South America that British suspicions of a raider at large were confirmed. Graf Spee was operating in tandem with her supply vessel, the tanker Altmark and proved to be a formidable and elusive enemy. The Royal Navy immediately mobilised hunting groups of warships to track down the enemy and one of those hunting groups was the South Atlantic Squadron under Commodore (later Admiral Sir Henry) Harwood, flying his broad pennant in the cruiser HMS Ajax with two further cruisers Exeter and the New Zealand manned Achilles. These vessels more than matched the Graf Spee for speed but were vastly outgunned by the German vessel. Nominally Harwood had a fourth cruiser, the Cumberland but she was at Port Stanley in the Falkland Islands undergoing a self-refit, so already Harwood’s force was somewhat depleted. However, Henry Harwood was a shrewd operator and he had been using the intelligence available to him to try and calculate where he could intercept the raider. Many of the British ships sunk by the Graf Spee had bravely transmitted an ‘RRR’ signal together with a position, which indicated that the vessel had been attacked by a surface raider. It was doubly brave to send these warning signals as the Germans threatened dire consequences for any radio officers sending these messages. Fortunately for the British, Kapitan Langsdorff was an honourable man who did not take reprisals against his captives and was scrupulous in his fair and humane treatment of prisoners. The same could not be said of his counterpart, Kapitan Dau of the supply ship Altmark and the British merchant seaman held on board this vessel, whilst not physically harmed, were kept in squalid conditions in one of the ship’s holds. A number of British Merchant Navy officers were transferred to the Graf Spee for her anticipated voyage back to Germany and the difference in the treatment they received on the pocket battleship was notable.

Not all of the vessels intercepted by Graf Spee managed to send an ‘RRR’ report but enough did to allow Harwood to undertake some inspired detective work. Piecing together the reported positions of the sunken vessels, he was convinced that Graf Spee would return to the South Atlantic for one final tilt at the constant stream of British merchantmen heading from the River Plate with much needed meat for the home market.

Having made his dispositions accordingly, Harwood concentrated his three cruisers off the River Plate and waited for Graf Spee to appear. On December 13th 1939, the German pocket battleship obligingly sailed over the horizon. Harwood’s plan for this contingency was to split the enemy’s fire by dividing his own force; the two smaller cruisers Achilles and Ajax formed one division, whilst the more heavily armed Exeter was to fight alone. It was at this early point in the battle that Langsdorff made his first and ultimately fatal error. On approaching the British vessels, Langsdorff wrongly assumed that Exeter was the sole cruiser and that the two smaller vessels were escorting destroyers and closed accordingly to make a quick kill. Once he closed the range and had realised his mistake, it was too late. The three cruisers tore into the pocket battleship and harried her relentlessly. At first Exeter bore the brunt of the raider’s counter attacks and was soon turned into a blazing, sinking shambles with all of her main armament knocked out. At first Captain Bell of the Exeter considered ramming Graf Spee, but he was ordered by Harwood to retire from the battle and was soon heading towards the Falkland Islands which she eventually reached in order to lick her wounds. The remaining two lightly armed cruisers kept up the pressure, closing the range and hitting Graf Spee and hitting hard. Fearing that the two British vessels were leading him onto superior heavy forces, Langsdorff inexplicably turned and ran; heading towards the River Plate, he eventually reached the sanctuary of the River Plate within the territorial waters of the neutral country of Uruguay. She had suffered thirty seven men dead and fifty seven wounded and whilst the ship was in no way mortally wounded, she had been hit over fifty times and had suffered extensive damage. Unknown to the pursuing British forces, there were sixty one British Merchant Navy officers aboard who had fortunately been unhurt in the battle. Once the fighting was over, a different kind of battle was about to begin, involving diplomacy, bluff and counterbluff that was ultimately to cost Langsdorff his life.

Despite the strain he must have been under, Langsdorff once again proved his humanity and sense of honour by releasing his erstwhile prisoners according to international law. Afterwards, these officers to a man had nothing but praise and respect for their former captor.

It was estimated that Graf Spee’s battle damage would take fourteen days and during this time, Langsdorff knew that the British would be mustering reinforcements but what he was not to know was how long it would take for these reinforcements to arrive. It was now the 14th December and the nearest heavy British unit, the battlecruiser Renown and the aircraft carrier Ark Royal could not reach the River Plate until the 19th December but Langsdorff was not to know this. The British ambassador to Uruguary, Eugen Millington-Drake (pictured below with Harwood) and his naval attaché, Captain (later Admiral Sir Henry) McCall, used every trick in the book to conjure up an imaginary British fleet massing just over the horizon. German requests to charter light aircraft to survey this fleet were always rebuffed; no aircraft were ever available. The British also tried their hardest to get Graf Spee interned; Langsdorff must have been in mental turmoil.


Sir Henry Harwood
Faced with an impossible situation, he decided to scuttle his ship and on the 17th December moved his ship into the shallower waters of the River Plate and after evacuating the remainder of his crew, shortly before 20:00 she blew up; demolition charges had been set by the crew and the Graf Spee was no more.

The watching British on the two remaining cruisers, by now reinforced by the Cumberland, which had made a helter-skelter dash from the Falklands watched with incredulity and relief; they had expected another bloody battle and could not have been certain of the outcome. As it was they had won a great victory, partially through hard fighting and partially through bluff but the Royal Navy had won the first major engagement of the war.

For the crew of the Graf Spee, internment in Argentina was on the agenda but for Langsdorff, and honourable man to the end, there was to be no such escape. On the evening of the 19th December, after addressing his officers and men for one last time, he retired to his hotel room, wrote three letters to his wife, his parents and one to the German Ambassador to Argentina. He then shot himself whilst wrapped in the ensign of the old Imperial Navy, rather than the Nazi flag.

Back home, the victorious ships’ companies marched through London and Winston Churchill, not yet Prime Minister but still at that time First Lord of the Admiralty proclaimed that the victory “in a dark cold winter, it warmed the cockles of the British heart.”

For those at sea, there was no Phoney War; for those at home, the war was still distant but 1940 would see a change that would bring the conflict home to everyone.

Published Sources

BEF Ships before, at and after Dunkirk – John de S Winser, World Ship Society, 1999

London at War 1939-1945 – Philip Ziegler, Sinclair Stevenson, 1995
The Battle of the River Plate – Dudley Pope, Secker & Warburg, 1987

The People’s War; Britain 1939-1945 – Angus Calder, Jonathan Cape, 1969

War in a Stringbag – Charles Lamb – Cassell, 1977